One of the best ways to continue your
growing season is with your very own DIY Greenhouse / Hoophouse. It
helps to extend both the spring and fall growing seasons, allowing you
to grow fresh vegetables nearly year round. In addition, it can be used
to finish growing and hardening off vegetable and flower plantings that
we start from seed each year in the early spring.
When it comes to DIY Greenhouse plans – a
large majority of the commercial kits simply look flimsy and
unattractive. Those that are a little more pleasing to the eye
unfortunately also seem to cost a small fortune!
So with the goal of building an
attractive and yet inexpensive hoop house – we set about designing one
that can use a mix of recycled and reclaimed materials, along with some
unique new ones. We want it to be more of a permanent structure – much
like a greenhouse would be – minus the high cost.
An Attractive DIY Greenhouse Design:
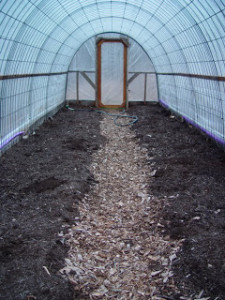
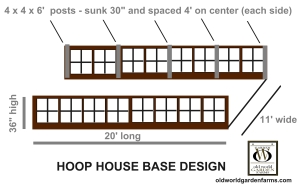
This hoop house measures 11′ x 20′ – with side walls that are 3′ high. To give it a little more of a permanent feel – you can use reclaimed windows along the lower portion, or simply run plastic to the ground if the windows are not an option.
Start by sinking (5) 4x4x6′ posts 30″
into the ground on each side – runing a simple bottom and top board
along each side to frame it in. The windows will then get attached
between the posts for the base. The two ends can be finished off by
framing out with common lumber and attaching two recycled glass doors,
or building a wooden frame with scrap lumber and attaching plastic. For
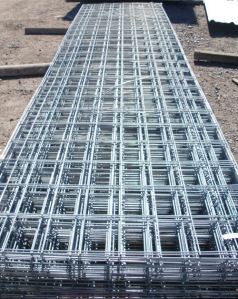
the arched roof, instead of metal poles or pvc – inexpensive cattle
panels can be used to create a strong and attractive roof line.

The panels ($19.99 each) are a great
looking and low cost way to provide strength – and can be easily
covered with plastic for fall, winter and spring use – or an attractive
shade cloth for the summertime. Each panel is 16′ long x 48″ wide – so
it only takes 5 to make the entire 20′ length needed. The panels bow
into shape for a perfect arched form. They can be secured to top of the
36″ side walls with nails, and panels can then be secured together with
ties to a single pipe running from end to end at the top of the curved
roof.
The hoop house is 9′ high at the apex of
the center line. This design allows plenty of room to work inside and
have a total of 3 raised row beds. The two outer beds can be 20″ wide
and run along each windowed side – the middle row is 3′ wide and can be
accessed by one of the two walking rows down the middle. You can place
24″ wire racking at the top of the 3′ knee walls to flats when
growing them out for the garden each spring.
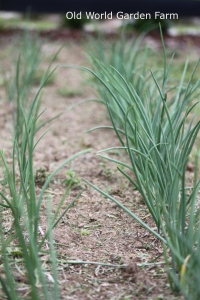
The growing rows below on the sides may
not sound wide – but they can be used for growing lettuce, kale,
cabbage, onions, radishes and other quick turnaround crops that do not
require much room.
Between
the ten posts ($60) the five fence panels ($100), assorted lumber for
framing and the plastic sheeting ($80) – you should be able to complete
the project for under $250, which is a far cry from what the commercial
units cost.

And that leaves you with your very own DIY Greenhouse / Hoophouse!
Happy Gardening – Mary and Jim


0 comments:
Post a Comment