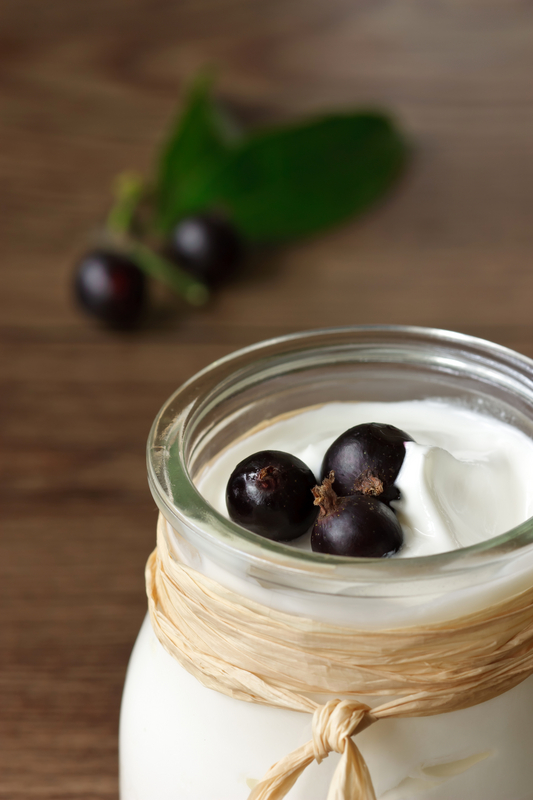
How to Make Yogurt
Yogurt is a creamy, probiotic-rich, nourishing, cultured dairy food. It teems with living bacteria that help keep your body’s systems in balance, especially your colon, which is essential for your body to be able to absorb the full range of nutrients you take in.1 The bacteria are also helpful in healing the colon from various gastrointestinal disorders, such as Irritable Bowl Syndrome, acute rotavirus gastroenteritis, and other diarrheal diseases. 2 The culturing of milk into yogurt utilizes lactic acid fermentation, in which the bacteria break down lactose, a sugar that naturally occurs in the milk. Because of this, the nutritional definitions of yogurt differ from the original milk, including being higher in folic acid, a necessary B-complex vitamin for women of childbearing age, and more importantly, actually increasing the bio-availability of folate3. This also makes yogurt more easily digestible than other milk products for people with lactose sensitivities.
Making yogurt at home can also save you 50-75% off the cost of buying it, making it certainly worth the effort!
What You’ll Need
Begin by gathering all your supplies. It’s incredibly helpful to have everything prepped and ready to go before you start.Equipment:
- Stockpot large enough to easily accommodate two litres of milk
- Whisk or wooden spoon
- Thermometer (optional, but extremely helpful)
- Containers for culturing and storing the yogurt (I typically use mason jars, but you can use any crock, glass jar, ceramic or glass bowl, or any other non-reactive container. Some people reuse old yogurt containers, but I personally shy away from any plastics that are difficult to get super-super clean. After all, you are going to be incubating bacteria at the perfect temperature for growth…)
- Bowl for whisking yogurt starter
- Your tools for incubation, according to incubation method: heating pad and towels, cooler or large stockpot, food dehydrator, etc.
- 2 litres (approx. 8 cups) milk
- 1/2 – 1 cup yogurt starter culture – this can be a cup of yogurt from your last batch, a cup of plain store-bought yogurt with no gelatin or other additives, or a packaged yogurt starter
Making Yogurt
There are four parts in the yogurt-making process: warming the milk, cooling the milk, inoculating it (culturing it), and incubating it.Sterilize
- Make sure all equipment is very clean. If possible, sterilize your jars or containers in a pot of boiling water.
- Place the milk in a saucepan or stockpot large enough to comfortably accommodate the milk with a bit of room for whisking. Preferably choose a heavy-bottomed pot with a lip, as this will reduce the amount of milk that scalds and will help make pouring the milk later drip-free.
- Heat to 180-190, whisking occasionally, especially once the milk passes 160. (This is when it begins to foam and scald – latte anyone?) If you don’t have a heavy-bottomed pan and your milk does begin to scorch and stick to the sides of the pan, don’t stress about it. Just take a bit of extra care when you’re whisking so that you don’t scrape off any of the scalded bits into the milk – you can just clean them out later. Also, a note about why you’re heating the milk – regardless of whether you’re using raw milk or conventional milk, gently heating the milk in this manner physically changes the molecular structure of the milk proteins which will result in a decidedly firmer yogurt.
- Once the milk has reached 180° or so, cool it to approximately 115°. [If
you don't have a thermometer, I've heard it said that the milk is cool
enough when you can hold your (very clean) little finger in the milk for
10 seconds.] You can cool your milk in a number of ways; just choose which works best for you.
- an ice bath cools the milk quickly and safely
- place it in the refrigerator (if you’re doing a large batch, such as a gallon or more, this method is not preferable as it will heat the refrigerator too much as it cools)
- in the winter, you can cover it and place it outside away from pets, other animals, or anything that could knock it over or fall in it
- just cover with a cloth and let it sit at room temperature until it’s cool – this will typically take a few hours
- Have your starter culture ready in a bowl. When the milk has reached approximately 112 degrees, whisk some of the warm milk into the starter culture, then whisk the warmed culture into the entire pot of milk. After the mixture is mixed, pour the prepared milk into your containers.
- At this point you have your choice of how to incubate it. The yogurt
culture needs to sit at 108-112 degrees for 6-8 hours, so however you
can come up with to keep it at that temperature should work just fine.
(My sister even successfully set her jars outside for a number of hours
covered with a towel when she lived in sub-tropical climes. That
definitely wouldn’t work in my more northerly location!)
Here are some of the most popular methods:
Oven overnight: Preheat your oven to it’s lowest temperature – basically turn your oven control dial just until the indicator light comes on. If you’ve got touch buttons, set it as low as it will go. You just want the temperature to be around 112 without being much warmer than that. When the oven is preheated, turn the oven off, turn the oven light on, set your prepared containers in the oven, and leave them there for 6-8 hours – overnight is great. Remove them when the yogurt is thick.
Water bath: Set your prepared containers in a large pan with warm water as far up the jars as possible and cover with towels all around. Check the jars every couple of hours to make sure the water temperature hasn’t dropped. If the water is too cool, change the water to return it to the proper temperature. I used this method for quite awhile, but I found it to be a hassle, and it also disturbs the yogurt when you change the water, which can make the process not as effective. Remove the jars when the yogurt is thick after about eight hours.
Heating Pad: Set your prepared containers on top of a heating pad, invert a large stockpot over them, and cover the pot with towels. Turn the heating pad to “high” or “medium,” depending on your particular heating pad. Mine doesn’t get very warm, so “high” is definitely necessary. Also, be careful to note if your heating pad has an automatic shut-off feature. Mine turns off every half-hour, so when I use this method I have to make sure I turn the heating pad on again every 30 minutes. Remove the jars after 7-8 hours.
Note: If you’re using just one large container for your yogurt instead of several smaller containers, you can use the heating pad another way as well. Place your stockpot right side up, set a towel in the bottom, put your yogurt container inside it, wrap the heating pad around the jar between the jar and the wall of the stockpot, then cover the whole she-bang with a load of towels. Incubate as above.
Yogurt Maker:This typically only works for a litre or so at a time, as yogurt makers tend to incubate in one-serving size cups (which is great if you’ve got kids and your mornings are rushed – just pass them a little cup with some fruit and whole grains and they’ve got breakfast!). Spoon your prepared milk into the yogurt maker’s cups, set the lid in place, and turn on the machine. From that point, follow the manufacturer’s instructions.
- At the end of 6-8 hours, the yogurt should be somewhat firm and pull
away from the side of the container with only a bit of whey (extra
liquid). The yogurt will continue to firm up in the refrigerator, so for
the best flavor and texture, refrigerate at least six hours before
serving.
Yogurt Troubleshooting: If you’ve got too much whey, you likely incubated longer than necessary. If the yogurt is too thin, the temperature was too high or too low, the milk wasn’t fresh, or your starter wasn’t sufficient, either because you didn’t use enough or because the culture was old. Yogurt culture can degrade over time due to the introduction of foreign bacteria so using a fresh starter every few batches is recommended.
So, now you’ve got a fridge full of inexpensive, delicious, nourishing yogurt! And even better, if you are able to do this regularly, it will become second nature and an easy part of your kitchen routine.

If you’d like to get adventurous with your yogurt-making, check out these great resources for some variation.
Four Secrets to Thick, Creamy Yogurt Every Time
5 Ways to Make Thicker Yogurt
Making Yogurt with Raw Milk
Raw Milk Yogurt: To Heat or Not to Heat? That is the Question
Direct-set Cultures (video)
Making Greek-style Yogurt (video)
How to Make Non-Dairy Yogurts (video)
Alternative Milks for Making Yogurt
How to Make Yogurt in a Crock Pot
How to Make Yogurt without Fresh Milk
The Advantages of Room Temperature (Mesophilic) Yogurt
How to Make Room Temperature (Mesophilic) Yogurt (video)
10 Ways to Use Whey
No comments:
Post a Comment