Showing posts with label DIY. Show all posts

Monday, May 9, 2016

The Beginner's Guide to Making Impossibly Creamy Yogurt

The White Moustache’s Homa Dashtaki told me that making yogurt is magical to her. Magic. And I agree, because you are the catalyst in transformation—with heat and a bit of culture, milk becomes creamy and tangy and thick and sustaining.
And simply: If you’re looking to make more of your food from scratch, yogurt is a very easy and rewarding place to begin.
6929d4c1 1f69 4669 8d22 602dbe07365a  2016 03 20 10 42 18
Caroline Lange
Caroline Lange
best batch of yogurt yet! boil milk, let cool to baby-bath warm, stir in yogurt, keep cozy 8 hours. refrigerate after that.

Besides the magic part, there are reasons for making yogurt, even when you can buy it fairly cheaply nearly anywhere you go:
  • It’s less expensive. A gallon of milk will make just slightly less than a gallon of yogurt for about half of what you'd buy the same amount of yogurt for. If you strain your yogurt, you'll get a bit less yogurt—but you’ll also get a whole lot of electric-looking white-yellow whey, which you can either drink au natural, like I do, or use in any number of other ways (including adding it to smoothies, cocktails, breads, and brines). Two products for the price of one!
  • You control everything, from the milk itself to how tangy or mild and thick or loose your finished product is.
  • You don’t need any special equipment—no yogurt machine or thermometer or even recipe—to make it.

But you will need:

  • A heavy pot with a lid
  • A blanket
  • Whole milk
  • Pre-made yogurt (either your own or a store brand you like). This is your “culture.”
  • A vessel for your finished yogurt, like quart jars (or individual serving-size jars)
  • Cheesecloth (optional)

Here's how to do it:

1. Heat the milk, cool the milk.

For sake of explanation, let’s say you’re using half a gallon of whole milk. (This is easily halved or tripled or doctored to whatever amount of yogurt you want to make.) Why whole? The more fat in your milk, the creamier your yogurt will be, and the more it will set up. Homa, of White Moustache, advises that using organic milk, which typically has to be ultra-pasteurized, may not set up well. Others (including myself) haven’t had a problem with it. Up to you! If you can get your hands on raw milk (lucky dog!), by all means, use it.
Pour the half-gallon of milk into a heavy pot set over medium heat and slowly bring the milk up to a boil. Don’t be shy here; it needs to be a full rolling boil. Doing this kills any bacteria that could contend with the bacteria in your yogurt starter, but since most milk sold commercially is already pasteurized, you likely don’t have to worry about any bacteria. But heating the milk does change the structure of the milk protein casein, which is what will give you a creamy yogurt.
When the milk comes to a boil, remove the pot from the heat and let it cool. You’re looking for it to be baby-bath warm, and you’ll know you’ve hit the right temp when you can put your pinky finger in the warm milk and leave it there comfortably for 3 seconds.
More: Homa's tips and best practices for making yogurt at home.
Adding starter (AKA yogurt you already have, whether store-bought or homemade from a previous batch) to the warm milk.
Adding starter (AKA yogurt you already have, whether store-bought or homemade from a previous batch) to the warm milk. Photo by James Ransom

2. Add the starter.

That’s your yogurt sample, either from your previous batch of yogurt or from a store-bought yogurt. (Homa recommends Fage.) Add two tablespoons directly to your pot of milk, stir gently (or not at all, as Alana Chernila recommends as a way of preventing grainy-textured yogurt), then put the lid on your pot.
This is also a good time to add a splash of vanilla extract for a vanilla-flavored yogurt. Alana has also written about letting a vanilla bean steep in this warm milk while it sits.
A cozy environment allows the bacteria to multiply, which is what really turns the milk into yogurt.
A cozy environment allows the bacteria to multiply, which is what really turns the milk into yogurt. Photo by James Ransom

3. Bundle up!

Put your yogurt in a warm place for between 4 hours and 12 hours (overnight). The longer you let it sit out, the tangier it will be; I like a moderate 8-hour rest.
The yogurt needs to stay really warm during this rest; otherwise, the bacteria you added via the yogurt culture won’t multiply and your yogurt won’t set up! Folks like to do this in a couple of ways: Some will place the pot in the oven with the oven light turned on; others line a cooler with a towel and set the pot inside.
I have neither an oven with a working light nor a cooler, so my preferred tactic is to wrap my pot in a blanket (spreading the blanket on my kitchen table, setting the pot in the middle, and bundling the blanket up around the pot). Then I put the bundle on top of my refrigerator, which tends to be a warm, out-of-the-way spot in my kitchen.
After a 8-hour ferment, the warm milk-starter combo has transformed (!) into yogurt.
After a 8-hour ferment, the warm milk-starter combo has transformed (!) into yogurt. Photo by James Ransom

4. Refrigerate.

While your yogurt rests, get the vessels you’re planning on storing the yogurt in very clean by washing in hot, soapy water or running through the dishwasher.
After your yogurt has sat for your desired number of hours, it will have set up: Unbundle the pot, remove the lid, and take a peek. It should look firm and gelled, and, depending on the milk you used, may have a layer of cream on top (!). Scoop out a spoonful; whey will rush into the divot your spoon makes.
If you want your yogurt at this consistency (fairly loose but very creamy), you’re all done! Portion the yogurt into the clean vessels and refrigerate for at least an hour before serving.
Straining with a dishtowel, which has a tighter weave than a cheesecloth, will yield the purest whey.
Straining with a dishtowel, which has a tighter weave than a cheesecloth, will yield the purest whey. Photo by James Ransom

5. Strain for a thicker yogurt.

If you want a thicker yogurt, you’ll have to strain it. (Some like to add powdered milk as a way to thicken yogurt; I prefer not to add anything and to just strain it, in part because I like the whey so much and in part because I don’t want to buy something additional.)
Line a colander with a very, very clean dishtowel, and set that colander inside a large bowl or pot. Pour the yogurt into the lined colander, cover with plastic wrap (or a pot lid) and set the whole thing in the refrigerator. Even a couple of hours will make a big difference, but the longer you leave it straining, the thicker the yogurt will be (and the more whey you’ll have—more than 2 cups’ worth).
Strained yogurt on the left, whey on the right.
Strained yogurt on the left, whey on the right. Photo by James Ransom
Portion into jars and refrigerate.
Both yogurt and whey will keep for at least a week in the refrigerator. (What to do with the whey? Drink it straight, add it to cocktails, bake bread with it, and more.)

Friday, March 25, 2016

Homemade crackers, in no time flat


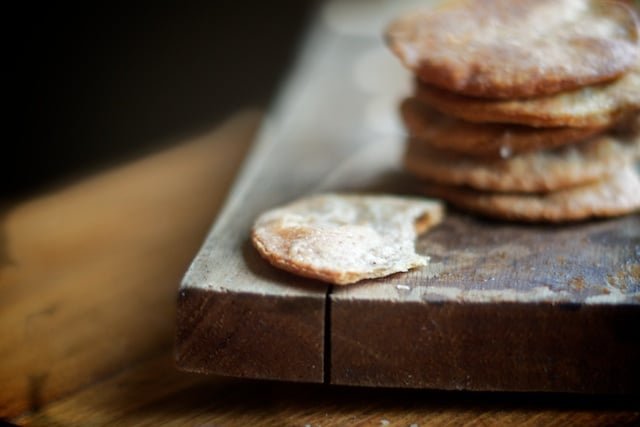
Parchment Flatbread Crackers (Deb Lindsey/FOR THE WASHINGTON POST)
https://www.washingtonpost.com/lifestyle/food/homemade-crackers-in-no-time-flat/2013/04/08/704380c0-9bd1-11e2-a941-a19bce7af755_story.html 
The day I paid nearly $11 for a four-ounce box of “artisan” crackers, I had to wonder:
Couldn’t I just make these myself?
Flour, olive oil, sea salt. Those were the only ingredients listed on the box. Make my own crackers? It seemed like the answer had to be yes.
The idea struck me as brilliant, for several reasons. It would save money. It would require no special equipment. It would let me customize snacks to my taste. And a bag of rustic-looking crackers, tied with a pretty ribbon, would make a charming hostess gift, for the next time I had a hostess.
So I decided to give it a try.
You might be starting to suspect that this is one of those stories where someone sets out to do something seemingly simple, only to stumble along the way and, finally, admit abject failure.
You would be wrong.
Turns out you can pretty much make crackers in your sleep. Or at least when you’re half-asleep, baking in the middle of the night to test recipes for a story about crackers.
I set out on my quest with just two parameters. First, I would spurn yeast. The goal was speed and simplicity, not hours waiting for single-celled organisms to digest dinner. Other leaveners — baking powder and baking soda — would be fine. Second, I wanted crackers for cheese, but not of cheese. In other words, no cheddar crackers, no Parmesan tuilles, no cheese straws, no blue cheese wafers, none of that. Just. Plain. Crackers. Ones that would work with a variety of cheeses, dips, spreads, tapenades, pepper jellies, whatever.
It was my lucky break to meet Pat Elliott at a food expo in Richmond. She’s the owner and founder of Everona Dairy in Rapidan, Va., a business that grew out of her desire to give her herding dogs something to do. She started out selling cheese and eventually decided to sell crackers to go with it. But they had to be produced right there at the dairy, not farmed out to another producer.
“I like to do everything I can for myself,” Elliott says. “I’m sort of a Renaissance woman. I just like homemade things better.”
She wanted a cracker made with butter — “I think butter adds a lot to cheese” — but found that most recipes called for olive oil. She hit on the right formula, then later added different flavors — cocoa, hot pepper, herbs — to pair with specific cheeses. That’s one of the beauties of DIY crackers. They’re a blank canvas, one you can embellish with your favorite herbs, seeds, flavorings and aromatics.
Elliott generously gave me her recipe, and as she had promised, it was ridiculously easy. Flour, sugar, salt, baking powder, butter, water. Yes, twice as many ingredients as my fancy store-bought crackers. But I turned out 100 crisp, golden, slightly buttery squares pretty quickly, and while the commercial crackers had cost me more than $2.50 per ounce, I could make an ounce of these for 12 cents.
Mine weren’t as whisper-thin as the Everona crackers, as I realized later when I bought a few bags of them at a farmers market to see how they stacked up. Elliott had told me that her baker uses a heavy marble rolling pin and presses the dough so thin you can see right through it. I fell a little short of that standard, but really, it didn’t matter. The results were satisfying. From there I moved on to the Everona cocoa crackers. They have only the barest hint of chocolate flavor, but Elliott says there’s enough of it to bring out the best in blue cheese. Another success.
As I branched out and tried other recipes, I learned that the thickness of the dough can be a crucial factor. Flaxseed crackers rolled out toone-eighth inch had the taste and mouth feel of cardboard. The same crackers at one-sixteenth inch were crisp, earthy and addictive. Rosemary flatbreads were excellent when rolled out thin, but outstanding when I ran the dough through a pasta machine, gradually taking it down four settings and ending up with translucent strips that I sprinkled with the chopped herb.
Lacking preservatives and factory-sealed plastic packaging, my crackers don’t have the shelf life of most store-bought ones. I seal them in zip-top food storage bags and keep them at room temperature, and most are good for several days, if not longer. Or I separate them into smaller quantities and freeze them. (Labeling and dating them first, of course.) Crackers that seem a little tired after defrosting or a little past their prime can often be revived by a brief stay in a 300-degree oven.
I mentioned earlier that you don’t need special equipment to make crackers — a rolling pin and a baking sheet will get you there — but a pasta machine or pasta mixer attachment can help create crackers that are thinner than hand-rolled, which often translates as better. My old hand-crank machine sets up in a minute and is good for turning out long oval or smaller round crisps.
Bottom line: DIY crackers are worth the time and effort, though I’d probably feel differently if I’d decided to go with yeast. But I love their look and taste, and I can imagine proudly presenting them — fetchingly packaged — upon arrival at my next dinner party.
Now, will someone please invite me?

Homemade yogurt & spelt crackers

http://nourishedkitchen.com/homemade-crackers/
Homemade crackers are well-loved in our home – rustic, flavorful and tender, they’ve become a favorite of both visiting children and adults.  While preparing homemade crackers doesn’t require too much time or kitchen know-how (even a novice can master the slow techniques of mixing, kneading and rolling), the results are simply lovely – a reminder of a time gone-by when everything served at the supper table was made with love, and always from scratch.
In our version of homemade crackers, we rely on whole grain flour for its rich and earthy flavor and nutritive value.  First whole grain flour is combined with fresh yogurt, and allowed to rest overnight which fulfills the dual purpose of not only improve the tenderness of the grain, but also improving its nutrient profile.  All whole grains contain antinutrients – naturally present substances like food phytates which keep the grain from sprouting until conditions for the plants growth are optimal, but also bind up with minerals in our digestive tracts, preventing their full absorption.  Fortunately, the traditional methods of soaking, sprouting or souring grains prior to preparing breads, cakes, muffins and even homemade crackers not only improves the bioavailability of minerals, but also improves their digestibility and flavor.

In this recipe for homemade crackers, we use whole, full-fat yogurt to soak the flour before combining the dough with good quality grass-fed butter, which creates a flaky texture and crumb.  Season the crackers with coarse sea salt, dried chives or dill, or leave them plain, anyway you make them is worth your time and effort.

homemade yogurt & spelt crackers
 
Prep time
Cook time
Total time
 
Flaky, tender, crispy – these homemade crackers take little effort; however, they’re prepared first by soaking whole grain spelt flour in fresh yogurt which both tenderizes the flour and improves its nutritive qualities. Consider adding dried herbs to the dough for a variation in flavor.
Serves: 120 crackers (12 Servings)
Ingredients
Instructions
  1. Stir three cups whole grain spelt flour and one teaspoon unrefined sea salt with one cup full fat yogurt in the bowl of a stand mixer equipped with a dough hook. Continue to process until the dough forms a smooth ball.
  2. Place the dough in a mixing bowl and cover it with a tea cloth. Leave the dough to rest at room temperature overnight and up to twenty-four hours.
  3. Once the dough has rested overnight or up to a full day, preheat the oven to 450 degrees Fahrenheit.
  4. Knead one-half cup softened butter into the dough, then divide the it into four separate balls to make rolling it more manageable.
  5. Flour your working surface and your rolling pin, place one ball of dough into the center of your work surface and roll it to ⅛-inch. Cut the dough into rounds with a biscuit cutter, or into triangles or squares with a pizza cutter or sharp knife.
  6. Brush each unbaked cracker with melted butter, prick with the tines of a fork to prevent puffing and bake in an oven preheated to 450 degrees Fahrenheit until brown and crispy, about six or seven minutes.

Thursday, March 10, 2016

50 Things You Should Stopp Buying and Start Making

You may be realizing that most conventionally made products out there contain a lot of toxic chemicals. Not only that, many of these products are harmful to our environment in a number of ways.
Making things yourself not only saves you money and helps the environment, but it lets you know where your products are coming from and exactly what has been put in them.
You can make anything from food items to personal care and cleaning products, all in very simple ways.
Remember: Whenever you can, use organic foods and ingredients in recipes. Use sea salt instead of table salt. Use healthy oils like coconut oil and raw cane sugar or honey as a sweetener instead of refined white sugar. Choosing the cleanest ingredients is the best choice for your mind and body.

50 Things You Can Start Making

Homemade Ketchup – This ketchup won’t break the bank, tastes better than the real deal, and contains no added sugar, so it’s good for the whole family.
Homemade Mayonnaise – This is a great recipe for any mayonnaise lover out there wanting to make their own at home. It’s simple and easy and tastes better than the store bought versions.
Peanut Butter – It is so simple to make this pantry staple it would be silly to buy it. With only 3 ingredients, you can make a tasty peanut butter that you can feel good about giving to your kids.
Simple Loaf Of Bread – This is a classic recipe for you to make and stop buying your normal weekly loaf of bread, laden with artificial ingredients and preservatives. Nothing beats the smell of freshly baked bread.
Homemade Nutella – If you’re going to let your children enjoy a chocolate spread, it would make more sense to give them one which you made, out of wholesome ingredients you can actually pronounce! Then how about this fantastic recipe…
Homemade Butter – Instead of buying preservative laden butter from the store, make your own butter with just 4 ingredients and a standard kitchen mixer… so simple yet so tasty.
Homemade Yoghurt – This recipe makes a thick and creamy yoghurt that would rival any store-bought version. Once you learn this method you won’t be buying it again!
Spice Mixes – Did you know that store-bought spice mixes and rubs have all sorts of questionable ingredients in them like fillers, preservatives, and other unwanted fake flavour enhancers? It is far healthier, cheaper, and tastier to make your own. Here are 17 combinations to start you off…
Salad Dressing – This simple recipe for homemade salad dressing will jazz up any old salad and make it fabulous. Forget the store bought versions, get your aprons on, and get making.
Homemade Maple Syrup – This classic sauce is so expensive these days, but did you know it is really simple and easy to collect your own?
Honey Shampoo – This shampoo helps reduce frizz, combat dandruff, and moisturizes and softens you hair all in one. A natural, kind to your skin shampoo that will make you think twice next time you are in the store.
Coconut Oil Deep Conditioner – With just three ingredients, you can whip up an economical, natural, and luxurious conditioner to treat your hair, leaving it soft, manageable, and shiny.
Body Wash – If you want to save money but have little time to spare, then this is the natural alternative for you. A simple recipe and method which makes a soapy bubbly wash that’s great for all skin types.
Shaving Cream – This shaving cream will leave your skin feeling soft and smelling fantastic. With ingredients like coconut oil, Shea butter, mint, and rosemary, you will feel invigorated and fresh after every shave.
Squeezable Homemade Toothpaste – Ditch those commercial toothpastes and opt for this natural re-mineralizing toothpaste that encourages white healthy teeth and improves oral health.
Minty Mouthwash – Not only is it chemical and alcohol-free, it costs practically nothing! Well, nearly nothing, at $0.02 /oz. You will save loads on money this, and improve your family’s oral health at the same time.
Super Strength Herbal Deodorant – Rather than use expensive chemical filled deodorants, why not make your own? This requires just a few ingredients, is “super strength,” and totally natural! (Alternative Link)
Honey, Beeswax & Almond Oil Moisturizing Creme – This recipe was  first devised almost 2000 years ago. Its thick, velvety, and decadent qualities will leave your skin silky smooth and hydrated.
Homemade Natural Sun Screen – Most sunscreens contain toxic chemicals and other harmful ingredients that could actually damage you when they should be protecting you. Check out this natural alternative and make the swap.
Cleansing Wipes – These organic wipes are totally natural and contain no hidden ingredients. Perfect for cleansing your face or as baby wipes for diaper changes.
Mascara – Arsenic, beryllium, cadmium, nickel, lead, and thallium are toxins we do NOT want to be applying to our skin! So opt for this homemade version and you will save money and protect your skin.
Tinted Lipstick – This recipe includes beeswax pastilles, Shea/cocoa butter, and coconut oil. It allows you to customize it with different natural powders, such as beetroot powder for red hues, cocoa powder for brown hues, and bentonite clay for a matte texture.
Eyeliner – How would you like to be able to make your own natural eyeliner (which can also be used as a smokey eyeshadow) for just $0.24? If yes – then check this recipe out.
Bronzer – This homemade bronzer is really easy to make, simple to customize, and so much better for your skin than store-bought varieties. A brilliant way of saving money too.
Natural Blush – Give your cheeks a rosy tint and brighten up your complexion with this easy natural blush recipe. Cosmetics are so pricey these days now really is the time to start making your own.
Foundation – This foundation from Robin at ThankYourBody.com contains all natural and non-toxic ingredients, it works fantastically (see a before and after foundation picture on the blog), and is really easy to make.
Under Eye Serum – Ingredients such as tamanu oil, vitamin E oil, grapefruit seed extract, avocado oil, carrot seed oil and more make this an effective anti-wrinkle eye serum that is totally natural.
Copycat Burts Bees Lip Balm – This wonderful copycat recipe from HappyMoneySaver.com reveals how you can make your own version of Burts Bees Lip Balm (normally priced $2.50) for just $0.12 per tube – what an incredible saving!
Lavender Bath Salts – Making these lavender bath salts couldn’t be simpler. You need just a few ingredients such as Epsom salts, sea salt, dried lavender buds, and lavender essential oil. From there it’s just a matter of following the instructions.
Anti-wrinkle Cream – Have you ever been tempted by those “miracle” creams that will make you look “ten years younger” that all the major beauty companies produce? Well, most are packed with chemicals, preservatives, and artificial ingredients and on top of that, they are outrageously expensive. Make your own instead!
Lemon Lavender Aromatherapy Candle – These Lemon Lavender Aromatherapy Candles burn clear and fragrant – unlike many toxic store-bought candles that release smoke and soot – and will make a wonderful addition to your home.
Reed Diffusers With Essential Oils – You can buy one in the stores, but usually they are quite expensive and the scents are made primarily from chemicals. Instead, why not make your own at home? You can use any essential oils you like and can blend different oils together to create an aroma that is perfect for you and your family.
Homemade Potpourri – Potpourri is so simple to make it would be silly to pay for it. You can tailor the fragrances to your favorite smells and add some seasonal elements to make it even more special.
Homemade Herbal Incense – Incense can be a wonderful way to add a beautiful aroma to your home, so take a look at this fantastic video which shows you how to make your own homemade incense with herbs.
DIY Scented Plug-in Refill – This great tutorial reveals how to get rid of the horrible toxic liquid found in chemical-laden store bought plug-ins and replace it with healthy and wonderfully fragrant, toxin-free essential oils.
Essential Oil Jelly Air Freshener – The great thing about these jelly air fresheners is that you can add ANY essential oil you want to, or even blend a few different oils together. Perfect if you have a particular scent you are trying to create.
Homemade “Fake Febreze” – A bottle of Febreze currently sells on Amazon for a whopping $6.99, yet you can make a homemade version that’s just as effective (and natural) for only $0.15. If you buy just one bottle per month, then that’s a monthly saving of $6.75 – and a yearly saving of $81! (We suggest you use a homemade natural fabric softener for this recipe.)
Homemade Mod Podge – If you are a keen crafter and go through tonnes of Mod Podge then why not have a go at making some for yourself, you will be surprised at how much you will save.
Un-paper Towels – Are you fed up with buying endless paper towels? If so, then this is the answer for you. These will act just like paper towels, but look pretty and are totally re-usable, meaning you only have to purchase the materials once. Not to mention they are economically friendly.
Homemade Natural Bleach Alternative – If you find bleach cleaners too strong and they sometimes irritate your skin or eyes, then this alternative promises to clean just like bleach but without the harmful side effects.
Beeswax Furniture Polish – This is a really simple recipe for a beeswax furniture polish that will restore shine and add gloss to your wooden furniture, returning it to its original beauty. No need for expensive store bought polish!
Homemade Bathtub Scrub – A wonderful bathtub scrub enriched with lemon essential oil and a surprising ingredient… ground up eggshells, which give the scrub its abrasiveness and, mixed with baking soda and a citrus-y essential oil, makes this fantastic bathtub scrub a real winner.
World’s Best Homemade Laundry Detergent – It is all natural, much cheaper than store-bought  (you’ll be saving around $0.16 per load!), cleans incredibly effectively, and works in all washer types. It’s also safe for septic tanks.
Homemade Liquid Dish Soap – This homemade liquid dish soap is fantastic. It’s natural, organic, and antibacterial. Plus it’s a great money saver! To make a 32 oz batch costs about $1.20 compared to $4.47 for the equivalent in Dawn dish soap.
All-Natural Foaming Hand Soap – This homemade foaming hand soap is: natural, green, non-toxic, chemical free, organic, gentle, and antibacterial. What more could you want from a hand soap?
Homemade Dishwasher Detergent Cubes– These are so simple to make, you just have to mix four ingredients together – washing sodaEpsom saltBorax, and lemon juice – and then allow them to dry. The resulting cubes work wonders on your dishes!
Homemade Natural Fabric Softener – Want to make your laundry smell amazing, and stay fresh and soft? Well this is the recipe for you. Most fabric softeners are really toxic and could be harmful to your skin.
Natural Disinfectant Spray – It contains just four ingredients: water, eucalyptus, lavender, and tea tree essential oil (all of which can be bought here). The essential oils have antibacterial, antiviral, anti fungal, and antibiotic properties, helping to clean and disinfect surfaces in your home without the chemicals and the expense. What’s more, they have a wonderful aroma!
Non-Toxic Glass Cleaner – Here’s a great tutorial revealing how to make your own green, non-toxic, all-natural glass cleaner for just $0.45 per bottle! Best of all, this cleaner works better than any commercial cleaner you can buy in the stores – and you can feel happy knowing that you are not putting your – or your family’s – health at risk with toxic chemicals.

Monday, February 1, 2016

46 Homemade Spice Mixes: Printable {English + Spanish!}

I’ve been meaning to get this printable done for a long time (truth be told, it’s been more than a year!).  My sweet friend Maria (who you met over in this post and also this post) translated these recipes for me into Spanish for any of you who might appreciate Spanish.  I remember her telling me that she stayed up until nearly midnight one night (it might have been more) translating it.  It takes a pretty amazing friend to do that!  I hope you can use it and then share it with others.
I came across this recipe list (it’s a book almost!) here over at www.rainydayfoodstorage.blogspot.com.  I loved it, but there was no way to print it from the original blog posting.  It was such a a great compilation however that I knew I wanted a copy for myself and why not share it with you too?!
In as much as it’s not my own and considering I haven’t tried all the mixes myself yet, I haven’t altered anything from the original source.  I’ve simply created a more convenient way for it to go into your cookbook (or the door of your cupboard) to be used.  One note:  the very last recipe, Chai Masala, has some formatting issues and I didn’t correct them on purpose.  I’m not familiar with that spice blend and didn’t want to interpret it incorrectly – you’ll have to be the judge on that one.
I hope you enjoy the {$$} you can save from not purchasing store bought spice blends while (at the same time) becoming more prepared with the spices you store!

46 Homemade Spice Mixes English1
46 Homemade Spice Mixes English2
46 Homemade Spice Mixes English3
Print Here!  46 Homemade Spice Mixes {ENGLISH} 

Print here for the {SPANISH} version of these recipes! ==> condimentos de myfoodstoragecookbook

Wednesday, January 27, 2016

DIY Greenhouse – How To Build An Inexpensive Hoophouse


 DIY Greenhouse
The interior of a basic hoop house design using inexpensive fence panels – in place of full plastic – you can build 3′ high walls and use reclaimed windows to add a little interest and beauty
One of the best ways to continue your growing season is with your very own DIY Greenhouse / Hoophouse. It helps to extend both the spring and fall growing seasons, allowing you to grow fresh vegetables nearly year round. In addition, it can be used to finish growing and hardening off vegetable and flower plantings that we start from seed each year in the early spring.
When it comes to DIY Greenhouse plans – a large majority of the commercial kits simply look flimsy and unattractive. Those that are a little more pleasing to the eye unfortunately also seem to cost a small fortune!
So with the goal of building an attractive and yet inexpensive hoop house – we set about designing one that can use a mix of recycled and reclaimed materials, along with some unique new ones. We want it to be more of a permanent structure – much like a greenhouse would be – minus the high cost.

An Attractive DIY Greenhouse Design:

Hoop House Base Design
This hoop house measures 11′ x 20′ – with side walls that are 3′ high.  To give it a little more of a permanent feel – you can use reclaimed windows along the lower portion, or simply run plastic to the ground if the windows are not an option.
Start by sinking (5) 4x4x6′ posts 30″ into the ground on each side – runing a simple bottom and top board along each side to frame it in.  The windows will then get attached between the posts for the base.  The two ends can be finished off by framing out with common lumber and attaching two recycled glass doors, or building a wooden frame with scrap lumber and attaching plastic.  For the arched roof, instead of metal poles or pvc  – inexpensive cattle panels can be used to create a strong and attractive roof line.
We will use cattle panels to create the arched canopy over the hoop house.
Use cattle panels to create the arched canopy over the hoop house.
The panels ($19.99 each) are a great looking and low cost way to provide strength  – and can be easily covered with plastic for fall, winter and spring use – or an attractive shade cloth for the summertime.  Each panel is 16′ long x 48″ wide – so it only takes 5 to make the entire 20′ length needed.  The panels bow into shape for a perfect arched form. They  can be secured to top of the 36″ side walls with nails, and panels can then be secured together with ties to a single pipe running from end to end at the top of the curved roof.
The hoop house is 9′ high at the apex of the center line.  This design allows plenty of room to work inside and have a total of 3 raised row beds. The two outer beds can be 20″ wide and run along each windowed side – the middle row is 3′ wide and can be accessed by one of the two walking rows down the middle. You can place 24″ wire racking at the top of the 3′ knee walls to flats when growing them out for the garden each spring.
The growing rows below on the sides may not sound wide – but they can be used for growing lettuce, kale, cabbage, onions, radishes and other quick turnaround crops that do not require much room.
Between the ten posts ($60) the five fence panels ($100), assorted lumber for framing and the plastic sheeting ($80) – you should be able to complete the project for under $250, which is a far cry from what the commercial units cost. 
We will use the hoop house to grow lettuce, spring onions, radishes, kale and other crops through much of the year
The hoop house is perfect for growing lettuce, spring onions, radishes, kale and other crops through much of the year
And that leaves you with your very own DIY Greenhouse / Hoophouse!
Happy Gardening – Mary and Jim

Friday, November 6, 2015

Canning homemade Pork and Beans

One of the things that I work on as the canning summer season has past is to catch up on all the beans, meat, and potato canning. Because we spend so much time working on tomatoes for two to three months it's nice to take a break and do some jars that are great for quick meals or sides. 

Van Camp's Pork and Beans has been around for 140 years, but today we will change all that and put the power of the flavor and the elimination of the preservatives back into our hands. From the Ball Blue Book there is the recipe for Beans with Pork and Tomato sauce that will cross off another thing you don't have to buy at the grocery store anymore!

Sherrie did her jars of Pork and Beans a few weeks ago and I loved the picture so much I thought that I would share the recipe. Since most of us eat with out eyes here is why I wanted to share this recipe! Thanks Sherrie for letting me use your work to showcase one of the staples in most families homes that they can now make homemade! 

Homemade Pork and Beans
(makes 6 pints or 3 quarts)


1 quart dried navy beans (about 2 pounds)
1/4 lb salt pork, cut into pieces
1 quart tomato juice
3 tablespoons sugar
2 teaspoons salt
1 cup chopped onion
1/4 teaspoon ground cloves
1/4 teaspoon ground allspice


Put beans in a large saucepot. Add water to cover by 2 inches. Bring to a boil and boil for 2 minutes. Remove from heat and let the beans sit for one hour. Drain and cover with boiling water; boil for 3 minutes.
Remove from heat and let stand for 10 minutes;drain. Combine tomato juice, sugar, salt, onion and spices and bring it up to a boil. Pack 1 cup of beans into hot jar and put in a piece of salt pork and then fill jar about 3/4 full with beans. Ladle hot tomato sauce to within 1 inch from top of jar. Remove air bubbles from the jar and refill to proper headspace if necessary. Wipe rims and add hot lids/rings to the jars. Process in Pressure canner for 65 minutes for pints and 75 minutes for quarts at 10 lbs of pressure for weighted gauge and 11lbs of pressure for dial gauge.

Monday, September 28, 2015

Happy Armpits: Make Your Own Coconut-Oil Deodorant


Guest Writer for Wake Up World
I’ve always been picky about deodorants. Not because they didn’t do their “job”, but there was always something I wasn’t too happy with. Scent, consistency, usability, bottle shape, irritation, drying factor… Well, this whole pickyness escalated in 2003 when I read the ingredients printed on the packaging of my store bought deodorant.
Aluminium jumped right at me. Let me just explain what this most abundant metal in Earth’s crust does, and how it ended on our armpits.
Aluminium-based complexes react with the electrolytes in the sweat to form a gel plug in the duct of the sweat gland. What this means is that someone in some lab discovered that adding aluminium complexes into the already suspicious mix of ingredients in deodorants closes pores in the skin and prevents sweat production. Well, this new piece of information officially started my crusade for happy armpits, without metals from Earth’s crust.
The more I focused on finding a health-friendly deodorant, the more problems I’d create. Namely contact dermatitis, which is just a fancy way to say localized rash or irritation of the skin caused by contact with some foreign substance. It would get worse, then better, then worse again… an endless cycle that depended on seasonal changes, temperature changes, exposure to sunlight etc.
I allowed all this for years because my skin has always been very free-spirited and abundantly willing to express itself and its dislikes since childhood; so, I just took it as one of those things that the biggest bodily organ does on an equally strange human body.
But all this changed when I discovered Coconut Oil, a wonder of nature used in the Philippines for centuries.

Recipe for Homemade Deodorant with Coconut Oil

The recipe is simple….

Ingredients:

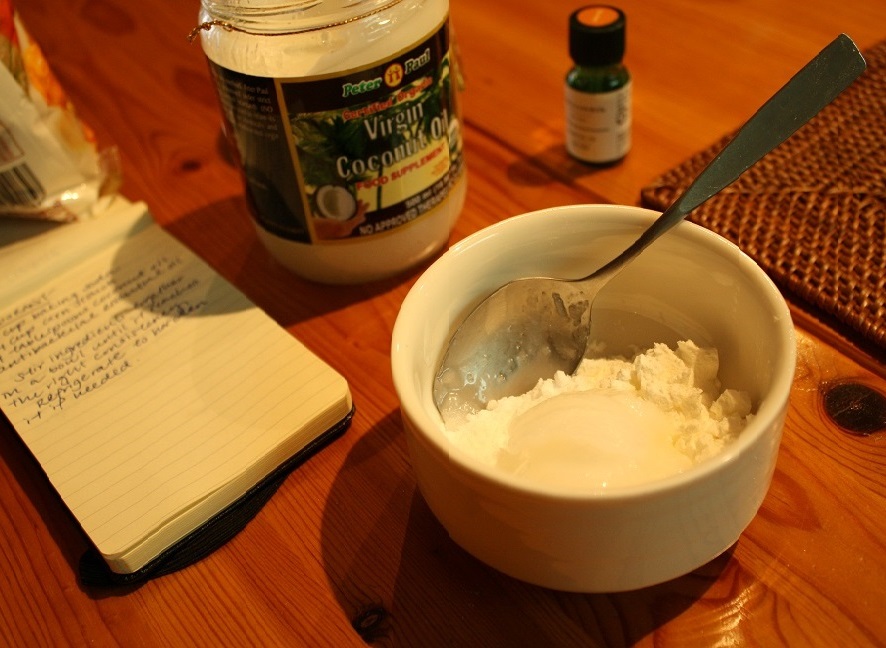
1/4 cup melted unrefined extra virgin coconut oil which corresponds to 4 tablespoons of solid coconut oil
1/4 cup baking soda
1/4 cup corn starch
10 drops of essential oils
Glass jar with lid

Steps:

Place all the dry ingredients into your favorite bowl
Add the melted coconut oil and essential oils and stir well.
You’ll end up with a fragrant paste which should be poured into a jar before it solidifies. Remember, coconut oil’s natural state is solid, and the end product should look something like this.
Leave it to cool naturally before placing it in the fridge for extra solidification. I like to keep it at room temperature for easier application, but you can also keep it in your fridge.

The Final Word

Oh, and in case you wondered how these ingredients have been proven to work… baking soda absorbs odors, cornstarch absorbs wetness and coconut oil is an anti-oxidant and a moisturizer with anti-fungal/anti-bacterial properties. The essential oils you added will add their own properties. In my case, I added lavender oil as an antiseptic and tea tree oil for its antibacterial, anti-fungal and antiseptic qualities.
And that’s how you can create happy armpits!

Thursday, August 20, 2015

Build an Outdoor Stove, Oven, Grill and Smoker

For only $300, you can build this durable outdoor cooking unit that can function as a stove, oven, grill, and smoker. 

http://www.motherearthnews.com/diy/home/stove-oven-grill-smoker-zmaz10amzraw.aspx?SlideShow=1 

By Owen Geiger
April/May 2010

The firebricks are stacked without mortar to allow for expansion and contraction as the temperature changes.

This DIY, wood-fired, outdoor masonry stove can be used four ways: for baking, grilling, cooking, and smoking. Whatever your cooking needs, our outdoor stove/oven/grill/smoker can do it, thanks to interchangeable grill grates and griddle surfaces. If you want to grill steaks or fish, use the grill grate. If you want to bake bread, slide on the steel griddle, stack some bricks on top to retain heat and add the door to hold in the heat. If you want to use the stove top, just slide the metal plate (or griddle) over the top of the firebox.
The MOTHER EARTH NEWS editors and I wanted to design a highly efficient, multi-purpose stove that uses little firewood (or charcoal) and retains heat for baking and cooking. So, we included a thick insulation layer of lightweight perlite/cement between the firebox and surrounding concrete block, and we included a removable door. This design holds the heat in the firebox where it’s needed. (Perlite is the porous white stuff often found in potting soils. You can buy this mined mineral product at garden centers.)
Lightweight cement provides insulation to maintain heat for long cooking times.
You can build the outdoor oven in stages, a few hours at a time. (You’ll need a few days between some steps.) Check local building codes before you start building. The oven is made from materials you can buy at local hardware or building stores. You may be able to find some of the materials at a salvage yard, too. (See the materials list and the building diagram). Detailed instructions for building the outdoor brick oven are below. Even if you only use it to bake bread, you can save enough money in one year to more than pay for the $300 cost.
This outdoor stove/oven/grill/smoker is made of concrete blocks and firebricks so that it will last a long time. 
Our DIY oven can blend beautifully into an outdoor kitchen.
Ideally, the stove is built to a comfortable height with concrete countertop space on each side, plus a roof to protect against the elements. We covered the concrete blocks with tile, primarily for aesthetic reasons, but you could apply stucco over the blocks, or just paint them. Having an outdoor sink and storage space nearby is also convenient.
Our outdoor oven requires a fire in the firebox for about 45 minutes to one hour to reach a baking temperature of 450 to 500 degrees Fahrenheit. Or, if you want to grill, you can start in less than half an hour. For comparison, it can take about three hours to get a clay earthen oven up to proper baking temperature. That’s a lot of time and firewood expended, which really adds up if you’re using the oven frequently. The firebrick used in our stove reaches cooking temperature more quickly than clay because its higher density makes it more efficient at conducting heat.
Another key design element is the firebox size — not too small, not too large, but just right. Properly sized fireboxes heat up quickly, have improved combustion, produce less smoke and stay hotter longer. We measured cookie sheets, bread pans, medium and large roasting pans, canners and baking dishes to arrive at our optimal firebox size of 13 inches wide by 28 inches deep by 13 1/2 inches high.

Bread! Pizza! Barbecue!

If you like to cook, you’ll love this stove. Our favorite cooking technique involves cooking foods in rapid succession at dinnertime. We like to start out with pizza when the oven is about 500 degrees. The pizza bakes in about three minutes. After that, the oven has cooled to 350 to 400 degrees — perfect for baking bread. (The temperature of the air in the oven drops momentarily when you open the door, but the brick is still hot and maintains temperature.) Sometimes we throw in some potatoes at this stage if we want baked potatoes. When the bread is done after about an hour, we bake various combinations of veggies (and sometimes dessert). You can bake a lot of food from one firing. And if you want added heat — to bake extra loaves of bread, for example — just keep a small pile of coals burning in the back of the stove.
In the outdoor oven, you can grill juicy meats and vegetables bursting with flavor, then push back the coals and bake a couple loaves of the best-tasting bread you’ve ever eaten.
Another efficient method is to grill meat and veggies before the baking phase.
Our plan includes a grill grate at midoven height for grilling food closer to the coals. This grill grate adds extra space for baking, almost doubling the capacity of the oven. It also provides space for a tray of water for bread recipes that require steam.
The outdoor oven is a super barbecue! About 95 percent of the smoke goes up the chimney after the fire is going strong, making for a pleasant grilling experience. There are two grilling surfaces (one on top and one at midheight). The heat remains steady with minimal fuss. And if you like more control over the grilling temperature, adjust the damper and add the door.

Oven Smoker

The outdoor oven provides the main requirements for a good smoker: It retains heat well, plus the damper and the vent in the insulated door allow you to control airflow. Use the grill grate (shelf at midheight) for holding food. Keep a small fire going and cook until tender. Unlike many smokers, large chunks of meat (even wild game) can fit easily in this stove.
For baking, place cement blocks on top of the firebox to maintain heat.

Canning in Summer

Using the stove for canning keeps extra heat out of your house during some of the hottest times of year when lots of vegetables are ripening. Just close the oven door and put the steel plate on the oven to use the cooktop. You can also use the stove top for sautéing, stir-frying or anything else you’d use a conventional stove top for.
Setting a canner on the grill instead of the stove top is even more efficient because the fire heats the canner directly instead of transferring heat through the steel plate.
You can control the heat using the damper in the chimney and the vent in the door.
You can cook or use a canner on the grill or the griddle.

Dutch-Oven Cooking

In addition to all the other cooking options, you can cook in a Dutch oven placed inside the firebox. Dutch-oven cooking is ideal for stews, chili, roasts, certain types of breads and rolls, beans and some desserts. It’s more efficient to use the Dutch oven inside the outdoor oven than outside on a campfire because it requires fewer coals.
You can bake bread right on the firebrick floor of the oven.

Why Not Clay Instead of Brick?

We chose our materials after extensive discussion with several outdoor oven experts, including John Gulland, Kiko Denzer, Carol Mack and John Stuart. I love using earthen materials — such as earthen plaster, adobe and earthen floors — but an outdoor oven is somewhat vulnerable to the elements. We wanted a durable stove. Our masonry stove should last many years longer than an earth oven. An outdoor earth oven can easily be damaged or destroyed by driving rain, snow, freezing weather or even termites.
The stove requires almost no maintenance. There’s no need to clean grease out of the oven because it will simply burn away next time you use it.
The outdoor oven won instant approval from my mother-in-law. She recognized its practicality and was all smiles. Cost to build outdoor oven: $300. Approval from mother-in-law: priceless.


Build It

The wood-fired stove is not only versatile, but easy to construct. Follow these detailed instructions on how to build the stove, and in about two weeks, you’ll be ready to start grilling, cooking, baking and smoking.

Site Selection

Choosing the right location for your stove is important for convenience and optimizing its use. Putting it near your indoor kitchen will save lots of steps, but consider the direction of prevailing breezes so smoke doesn’t blow toward your house or outdoor dining area. Face the stove door downwind for optimum results. Also, consider privacy, ambience, adequate drainage, and space for wood and fire starting supplies. Optional considerations could include adequate space for a cover (highly recommended), dining space, additional countertops and any other extras you might want.

Concrete Foundation

After you’ve selected and cleared your site, build a foundation to support the stove. A low-cost rubble trench foundation is recommended for most situations. The specifics will vary due to climate and soil conditions, but a rubble trench is usually 18 to 24 inches deep and filled with gravel, or gravel and stone. If you’re building the stove in a harsh climate with strong freeze-thaw cycles, add a French drain (a small valley filled with stones) to remove moisture. Raise the building site if necessary to avoid moisture problems.
For our rubble trench foundation, we used chunks of recycled broken concrete, also known as “urbancrete,” instead of stone. Concrete chunks from flatwork slabs, such as sidewalks and driveways, work best. They can be recycled and stacked like stone. Stack these up in layers to the top of the trench. Fill gaps with gravel and then tamp solid.
On top of the rubble trench, pour a 3 1/2-inch by 40-inch by 40-inch concrete pad. This will create a strong, level foundation for your stove. Make sure the pad is level and square. (We poured an entire concrete floor for our outdoor kitchen instead of a just a small leveling pad, but the concept is the same.)

Concrete-Block Base

The next step is to build a concrete-block base two courses high with ladder reinforcement (a wire mesh designed to add strength and prevent cracking) between each course. Use 4-inch by 8-inch by 16-inch blocks with a few half blocks as needed. Be sure to lay the block as perfectly plumb, straight and square as possible. Allow to dry for two days or so to gain strength.
Fill the base with gravel or a mixture of sand and gravel. Fill the base with two 6-inch layers, tamping each layer gently. Go easy on the tamping so as not to strain the concrete block joints. All you’re trying to do is settle the materials.
Complete the base by pouring a 4-inch layer of lightweight cement level with the top of the block base. This creates a strong, insulated layer under your firebox. Perlite is perfect for high-heat applications such as this. (According to the Perlite Institute, perlite is used to make gas fireplace logs.) Perlite mix for base: 1 1/3 bags cement, 13 pounds perlite and water. This cement-rich mix is strong enough to support the heavy load of firebricks and countertop, yet also insulate the firebox from the mass below. Let the concrete cure for four to five days.

Firebrick Hearth and Firebox

After about five days, the lightweight concrete should have cured sufficiently and you can begin building the firebox with firebrick. Place a half-inch layer of fine, clean sand on top of the lightweight cement. We screened our own sand (one two-gallon bucket) through fine mesh. Use a straight edge to make it as level as possible. Precise leveling is a critical step that determines the accuracy of the firebox.
The first layer of firebrick creates the hearth. Standard firebrick size is 2 1/2 inches by 4 1/2 inches by 9 inches. The front row of firebricks is perpendicular to the other firebricks and extends 2 inches beyond the concrete block. This makes it easy to sweep coals and ashes into a bucket. We added half-inch concrete board shims under the front edge for stability, where sand would fall away.
All firebricks are placed without mortar so they are free to expand and contract. The placement technique involves carefully sliding each firebrick straight down — one against the other — into place to avoid gaps. After the first course is set, use the end of your hammer handle to tap on any high spots until all firebricks are flush with each other.
Measure the front of the base and find the center, which should be about 20 inches from either side. Start the first layer of firebricks by placing two bricks on either side of the center of the base, making sure that the brick hang over the front about 2 inches. (The first layer of firebricks should be 8 1/2 inches from the back and 11 inches from the side of the base — if you follow the diagram instead of the photos.)
I made a last-minute decision to lengthen the firebox by 4 1/2 inches (one firebrick width). In hindsight, this probably wasn’t the best choice because now we have minimal insulation on the back of the firebox. My advice is to use one less row of firebricks than shown in the photos. So the hearth will have 14 firebricks, not 16 as shown in the photos. The drawing shows the recommended approach, and the materials list below is based on this smaller firebox.
Continue stacking firebricks for the sides of the firebox. These are stacked on edge as shown. The firebox is easy to build and the bricks can be stacked in about one hour. You may encounter a few firebricks that are not perfectly sized. Buy a few extra so you have spares. It’s important to keep everything plumb, square and level, and all firebricks flush with each other, with no gaps.

Steel Shelf

If you don’t have experience welding and cutting metal, you might want to have a machine shop make the metal pieces for you. Otherwise, you’ll need a welder and a cutting torch for this step.
At this point, you can put the steel shelf (lintel for chimney) in place. It measures 14 3/4 inches by 18 inches by 1 1/2 inches (the sides are 1 1/2 inches high) and is made of quarter-inch steel. The most important measurement is the inside width, which for our shelf was 14 1/4 inches. This allows firebricks to fit perfectly without being cut. The steel parts are joined with six spot welds: three per side, on the bottom so they don’t interfere with placing the firebrick. With a cutting torch, cut a 6-inch diameter hole in the center for the stovepipe. With the steel shelf in place, flush with each side, set the remaining firebricks in place to form the chimney base.
Diagram for the steel shelf (lintel for chimney).

Concrete Block — Upper Half

To form the outside of the oven, set the remaining two courses of concrete blocks (with ladder reinforcement between courses), being careful not to bump the firebricks. Around the firebox opening (where the concrete blocks meet the firebricks), leave an eighth-inch space to allow for expansion and contraction. We stacked CEBs (compressed earth blocks) temporarily inside the firebox to keep them in place. Bricks would work just as well. Let the block dry for two to three days.
You’ll need a right angle grinder or wet saw to cut a few concrete blocks around the front of the firebox. Both tools will do the job, but my preference is a right angle grinder because of its low cost, ease of use and versatility. (You also might be able to rent one for this project.) We used it to cut CEBs for the wall behind our kitchen, steel reinforcement, tile and concrete blocks. We even used it to grind and sand our wood poles for the cover and to grind the edges of our concrete countertops and griddle. It paid for itself on this one job.

Lightweight Cement

You can now fill the area between the firebox and concrete block with lightweight cement. We used a higher ratio of perlite for this to maximize insulation around the firebox (compressive strength is of less concern on this part). Perlite mix for upper half: two bags cement and slightly less than 26 pounds perlite. (We saved a tiny amount for the insulated door and chimney base.) Allow to dry a few days before proceeding.

Concrete Countertop

The next step is to build the countertop. We chose poured-in-place concrete countertops for their strength, and resistance to heat and moisture damage. For instance, we don’t have to worry if a storm blows some rain into the kitchen. Strength is important so we can clamp a grain grinder to the countertop, an important issue if you’re going to bake healthy breads. Our countertop design holds the firebricks in place. Although hot pads are typically used, we don’t have to worry about setting down hot pans hurriedly or otherwise be overly concerned about damaging the surface. Tile is also very practical, but we used it on the sides of the stove and wanted something different on top. Stone is another good choice, but too expensive for our budget.
We were looking for an inexpensive way to make concrete countertops and came up with a pretty good solution at a fraction of the cost of custom made countertops — about $20 instead of $2,000. (This cost is for 12 1/2 lineal feet of 25 1/2-inch countertops.)
We used 100 percent scrap materials for forming, about a half bag of cement, some quarter-inch rebar, and baling wire, sand, gravel and iron oxide pigment. Forms consisted of leftover eighth-inch cement board and scrap wood. We placed rebar in a grid pattern and then poured concrete on top. Create an eighth-inch space between chimney and countertop with a removable shim to allow for expansion and contraction. As the concrete set up, we used an edging tool to round the edges. Pigment was troweled on the surface as the concrete started to set up. It only takes a tiny amount of pigment sprinkled here and there to create a beautiful color. After the forms were stripped in three days and the edges touched up, we applied a “paint” of iron oxide mixed with water to the edges. You might want to splurge an extra $10 to $20 and add pigment to the entire mix to make integrally colored concrete.
(Full details on building your own cast-in-place concrete countertops will be available in the future.)

Oven Chimney

Building the chimney is straightforward. There is a damper within easy reach to control air flow and save firewood; open it up when starting fires, and close it down when baking so all the heat doesn’t shoot up the chimney. A cap on top of the stovepipe keeps out rain and snow, and a boot (or collar), along with some silicone, seals the connection on the roof. The stovepipe is in sections to facilitate removal and cleaning. The gap between the stovepipe and chimney base is filled with lightweight cement.

Tile Cladding

Tile is an excellent finish material that withstands a lot of abuse but also looks beautiful. You can get creative with tile, and it’s a good value. To decide on the color, bring samples home from the store and see what looks best. You might want to choose tile in advance and make slight adjustments to the stove size for a perfect fit. You can tweak sizes of concrete block joints to get tile to fit perfectly and reduce the amount of tile cutting. You can also apply stucco to the concrete blocks or simply paint them.
To apply tile, first scrape the block wall clean of concrete residue. Use a drop cloth to protect the floor. Line up the tile to determine even spacing. Draw a level line around the stove as a guideline for the first row. (We started at the base on the front.) Mix a bucket of mortar, brush water on the back of each tile (or soak tile in water) and trowel on about three-eighths inch of mortar with a pointed trowel. Taper the edges, and lightly press each tile into place. Check for alignment in each direction. A few light taps of your trowel handle will seat the tile firmly in place. Check again for plumb, level, even spacing and to ensure the tile is in the same plane as the stove. It helps to change your angle of view and sight lengthwise along the surface periodically.
Allow the tile to set up a bit and then work grout into the joints with a rubber grout float. Do one section at a time, smoothing the joints and cleaning the surfaces in stages with a sponge. Squeeze out extra moisture from the sponge so the joints aren’t weakened by too much water getting into the grout. Remember to allow an eighth-inch gap between tile and firebricks for expansion and contraction.

Smoker Grate

All you need to turn your outdoor oven into a smoker is a grill grate (or typical oven grate) about (midheight) in the firebox. Simply drill four holes in the firebrick lining the firebox, insert steel pins in holes and add the shelf. You can also suspend a drip pan from the grate with wire. An oven thermometer is useful for making sure the temperature is right throughout the smoking process.

Grill Grate and Griddle

The outdoor oven uses a grill grate and a griddle of the same size to enable multiple cooking functions. Simply replace one with the other depending on how you’re cooking. For frying, baking or boiling, use the quarter-inch steel griddle. For baking, stack bricks or concrete blocks on top of the griddle to store heat. Another nice feature is adding a grate on the bottom of the firebox to raise pans slightly to improve air circulation and reduce burning. Another optional energy-saving feature is to add a stove gasket to seal the griddle and prevent air leaks.

Oven Door

The door is the key feature needed for baking. We built a 2-inch-thick insulated door of sixteenth-inch steel filled with perlite. This is another firewood saving feature. The front piece of the door forms a lip that hangs over the firebox opening about half an inch to help reduce air leaks. The large wooden handle doesn’t get too hot to touch and enables the door to be installed and removed with one hand. There are no hinges; the door wedges into place. We added an adjustable vent to control airflow and spray painted the door with heat paint. Based on our experience, a 1 3/4-inch hole in the door seems to be the perfect size. If you’d prefer a simpler method for building the door, make a thick hardwood door with a piece of metal on the inside, allowing about a quarter-inch air gap between wood and metal. You could rabbet the edges for a tighter seal. Also, a thermometer built into the door would be a nice feature.
For additional control of airflow, the door has an adjustable vent.

Fire It Up!

Wait a few days for the tile to cure before firing up the stove for the first time. We started with a small fire and gradually, one fire per day, built increasingly larger fires in order to drive out any remaining moisture.

The Fastest Way to Start a Fire

Place two 2-inch-diameter pieces of firewood in each side of the firebox. Add crumpled newspaper between and place dry sticks on top of the newspaper across the 2-inch pieces of firewood. Add more twigs (up to the size of your little finger) on top in a crisscross pattern. Avoid placing too much wood at first to allow good airflow. Have everything ready before lighting the fire: small split kindling and 1- to 2-inch pieces of firewood or charcoal.
Open the damper and the vent hole in the door. A lit candle can help start the fire quickly. Add kindling after three to four minutes when twigs are solidly ablaze. Add larger pieces after about 5 minutes. Wait 5 minutes and close both the damper and vent holes halfway.

Tips for Using the Outdoor Oven

  • Mop the hearth with a damp rag on a stick to create steam for improving certain breads.
  • Best types of wood to use: pecan and cherry (too much hickory or mesquite can make food bitter). Apple works well, too, but you’ll have to find what’s available in your area.
  • Cook from the side so you’re not standing directly in front of the firebox (this is more comfortable).
  • The stove can heat up to 400 degrees in as little as 15 to 20 minutes, depending on how the fire is built. Some may prefer to wait and let the firebrick store up more heat, but you could start cooking right away.
  • A covered baking dish works perfectly for making bread. It keeps moisture inside the container, which turns to steam and creates light, spongy, moist bread with maximum loft.
  • We keep a small fire burning in the back of the firebox while baking. This maintains steady heat and enables us to bake and grill multiple items. Reposition (turn) food occasionally to prevent burning.
  • Cover desserts with tin foil or a lid to prevent unwanted smoke flavor. The same flavoring that makes grilled food taste so great can really ruin the taste of desserts.
  • When finished cooking, the last step is to scoop out coals and douse them with water. We use homemade charcoal, which means it can be reused again when dry.
  • Our cheap oven thermometer was obscured with smoke after just a few uses. (The smoke got inside the thermometer.) A good thermometer should last much longer. The best method is probably to add a thermometer in the door. This makes it easy to check the interior temperature without opening the door (which lets a lot of heat out very quickly).
    A bench brush (with natural bristles, not plastic) is very convenient for sweeping out ashes in the front of the stove. To prevent burning the bristles, first remove coals with a scoop. A whisk broom also works well. 
  • No line-drawing plans exist for this project. The diagram and materials list are all we have for this one.

    Here's a tip, though. The diagram show a cut-through version of the oven that precisely splits the oven in half. So where you see two firebricks in the front of the oven floor, the total will be four across the front.

    Engineer/contractor Owen Geiger is the co-developer of earthbagbuilding.com and often uses natural building materials.
    Photos by MEEMEE KANYARATH