Showing posts with label yogurt. Show all posts

Monday, May 9, 2016

The Beginner's Guide to Making Impossibly Creamy Yogurt

The White Moustache’s Homa Dashtaki told me that making yogurt is magical to her. Magic. And I agree, because you are the catalyst in transformation—with heat and a bit of culture, milk becomes creamy and tangy and thick and sustaining.
And simply: If you’re looking to make more of your food from scratch, yogurt is a very easy and rewarding place to begin.
6929d4c1 1f69 4669 8d22 602dbe07365a  2016 03 20 10 42 18
Caroline Lange
Caroline Lange
best batch of yogurt yet! boil milk, let cool to baby-bath warm, stir in yogurt, keep cozy 8 hours. refrigerate after that.

Besides the magic part, there are reasons for making yogurt, even when you can buy it fairly cheaply nearly anywhere you go:
  • It’s less expensive. A gallon of milk will make just slightly less than a gallon of yogurt for about half of what you'd buy the same amount of yogurt for. If you strain your yogurt, you'll get a bit less yogurt—but you’ll also get a whole lot of electric-looking white-yellow whey, which you can either drink au natural, like I do, or use in any number of other ways (including adding it to smoothies, cocktails, breads, and brines). Two products for the price of one!
  • You control everything, from the milk itself to how tangy or mild and thick or loose your finished product is.
  • You don’t need any special equipment—no yogurt machine or thermometer or even recipe—to make it.

But you will need:

  • A heavy pot with a lid
  • A blanket
  • Whole milk
  • Pre-made yogurt (either your own or a store brand you like). This is your “culture.”
  • A vessel for your finished yogurt, like quart jars (or individual serving-size jars)
  • Cheesecloth (optional)

Here's how to do it:

1. Heat the milk, cool the milk.

For sake of explanation, let’s say you’re using half a gallon of whole milk. (This is easily halved or tripled or doctored to whatever amount of yogurt you want to make.) Why whole? The more fat in your milk, the creamier your yogurt will be, and the more it will set up. Homa, of White Moustache, advises that using organic milk, which typically has to be ultra-pasteurized, may not set up well. Others (including myself) haven’t had a problem with it. Up to you! If you can get your hands on raw milk (lucky dog!), by all means, use it.
Pour the half-gallon of milk into a heavy pot set over medium heat and slowly bring the milk up to a boil. Don’t be shy here; it needs to be a full rolling boil. Doing this kills any bacteria that could contend with the bacteria in your yogurt starter, but since most milk sold commercially is already pasteurized, you likely don’t have to worry about any bacteria. But heating the milk does change the structure of the milk protein casein, which is what will give you a creamy yogurt.
When the milk comes to a boil, remove the pot from the heat and let it cool. You’re looking for it to be baby-bath warm, and you’ll know you’ve hit the right temp when you can put your pinky finger in the warm milk and leave it there comfortably for 3 seconds.
More: Homa's tips and best practices for making yogurt at home.
Adding starter (AKA yogurt you already have, whether store-bought or homemade from a previous batch) to the warm milk.
Adding starter (AKA yogurt you already have, whether store-bought or homemade from a previous batch) to the warm milk. Photo by James Ransom

2. Add the starter.

That’s your yogurt sample, either from your previous batch of yogurt or from a store-bought yogurt. (Homa recommends Fage.) Add two tablespoons directly to your pot of milk, stir gently (or not at all, as Alana Chernila recommends as a way of preventing grainy-textured yogurt), then put the lid on your pot.
This is also a good time to add a splash of vanilla extract for a vanilla-flavored yogurt. Alana has also written about letting a vanilla bean steep in this warm milk while it sits.
A cozy environment allows the bacteria to multiply, which is what really turns the milk into yogurt.
A cozy environment allows the bacteria to multiply, which is what really turns the milk into yogurt. Photo by James Ransom

3. Bundle up!

Put your yogurt in a warm place for between 4 hours and 12 hours (overnight). The longer you let it sit out, the tangier it will be; I like a moderate 8-hour rest.
The yogurt needs to stay really warm during this rest; otherwise, the bacteria you added via the yogurt culture won’t multiply and your yogurt won’t set up! Folks like to do this in a couple of ways: Some will place the pot in the oven with the oven light turned on; others line a cooler with a towel and set the pot inside.
I have neither an oven with a working light nor a cooler, so my preferred tactic is to wrap my pot in a blanket (spreading the blanket on my kitchen table, setting the pot in the middle, and bundling the blanket up around the pot). Then I put the bundle on top of my refrigerator, which tends to be a warm, out-of-the-way spot in my kitchen.
After a 8-hour ferment, the warm milk-starter combo has transformed (!) into yogurt.
After a 8-hour ferment, the warm milk-starter combo has transformed (!) into yogurt. Photo by James Ransom

4. Refrigerate.

While your yogurt rests, get the vessels you’re planning on storing the yogurt in very clean by washing in hot, soapy water or running through the dishwasher.
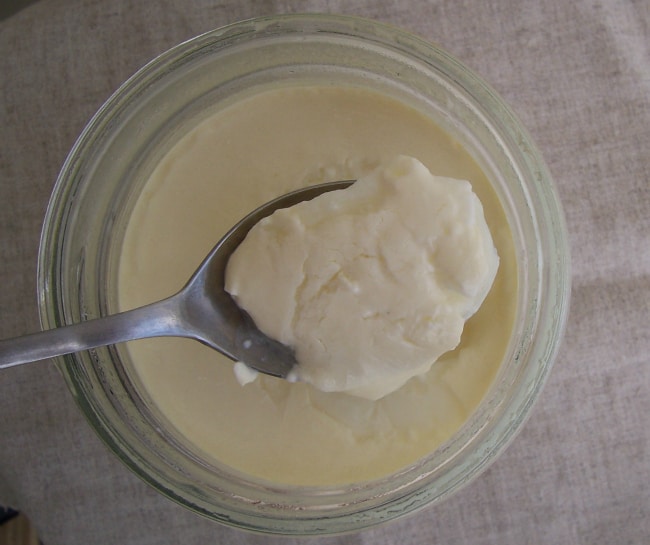
After your yogurt has sat for your desired number of hours, it will have set up: Unbundle the pot, remove the lid, and take a peek. It should look firm and gelled, and, depending on the milk you used, may have a layer of cream on top (!). Scoop out a spoonful; whey will rush into the divot your spoon makes.
If you want your yogurt at this consistency (fairly loose but very creamy), you’re all done! Portion the yogurt into the clean vessels and refrigerate for at least an hour before serving.
Straining with a dishtowel, which has a tighter weave than a cheesecloth, will yield the purest whey.
Straining with a dishtowel, which has a tighter weave than a cheesecloth, will yield the purest whey. Photo by James Ransom

5. Strain for a thicker yogurt.

If you want a thicker yogurt, you’ll have to strain it. (Some like to add powdered milk as a way to thicken yogurt; I prefer not to add anything and to just strain it, in part because I like the whey so much and in part because I don’t want to buy something additional.)
Line a colander with a very, very clean dishtowel, and set that colander inside a large bowl or pot. Pour the yogurt into the lined colander, cover with plastic wrap (or a pot lid) and set the whole thing in the refrigerator. Even a couple of hours will make a big difference, but the longer you leave it straining, the thicker the yogurt will be (and the more whey you’ll have—more than 2 cups’ worth).
Strained yogurt on the left, whey on the right.
Strained yogurt on the left, whey on the right. Photo by James Ransom
Portion into jars and refrigerate.
Both yogurt and whey will keep for at least a week in the refrigerator. (What to do with the whey? Drink it straight, add it to cocktails, bake bread with it, and more.)

Thursday, January 30, 2014

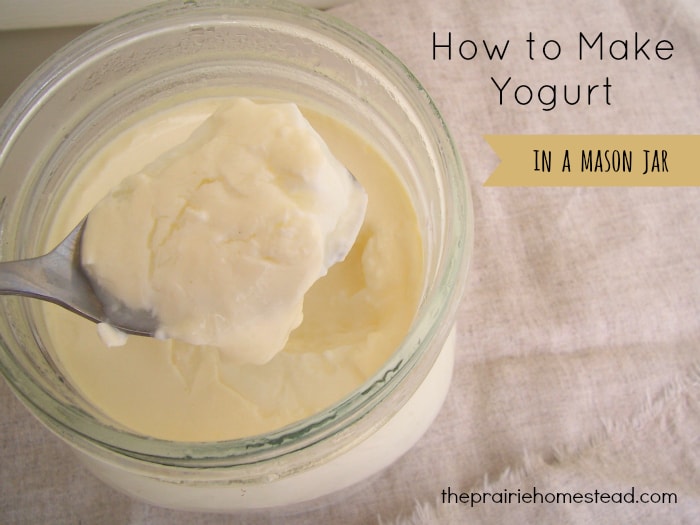
How to Make Yogurt in a Mason Jar

By

how to make yogurt
There are lots of reasons to make your own yogurt. But the most important?
It’ll make you feel like a homesteading rockstar.
Oh yeah.
Okay… so maybe that isn’t the *most* important reason, but it sure is fun.
And besides the rockstar-thing, homemade yogurt is super nutritious (hello probiotic-goodness without all the flavorings and additives…) and pretty darn frugal, too.
There are a million-and-one ways to make yogurt, and everyone seems to have their favorite method–Crockpot, yogurt maker, etc
I’ve tried a bunch of different methods, but I’ve settled on the one I’m sharing today. It’s the simplest yogurt method I’ve found (in my opinion), and I like that I don’t have to wash out my big ol’ stockpot or Crockpot when I’m done.
I like to make a gallon of yogurt (4 quarts) at a time since it stores for a long, long time without going bad. If you don’t want to make quite that much, the recipe can easily be halved or quartered.

How to Make Yogurt in Mason Jars

Supplies:
  • Large stockpot
  • Four quart-sized glass canning jars with lids
  • A thermometer (optional- see note below)
  • A small cooler
Ingredients:
  • 1 gallon milk* (see note below)
  • 8 Tablespoons of plain yogurt containing live, active cultures
Instructions:
Fill all four jars with milk, leaving a little room at the top– (around 2 inches). If you don’t have canning jars, you can use other repurposed glass jars instead. (It has to be glass- no plastic allowed!)
how to make homemade yogurt
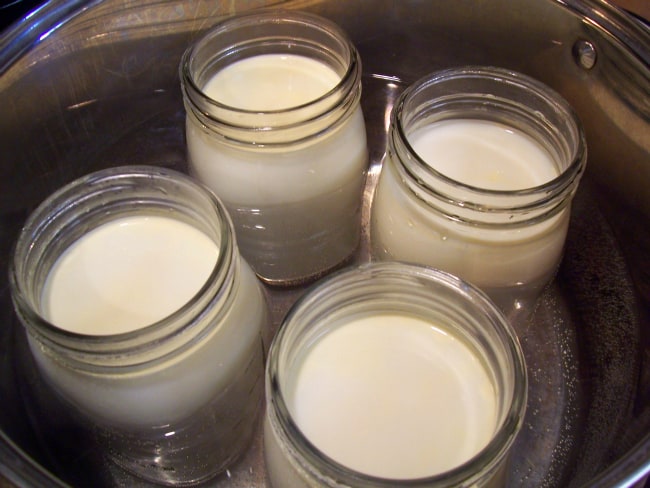
Place all four jars in the stockpot, and fill the pot with water. I usually shut it off when the water is about 3/4 of the way up the sides of the jars. If you are concerned about the jars rattling and breaking, you can place a small dishrag in the bottom of the pot before you set the jars inside.
Set the pot on the stove and bring the water to a boil. Allow the pots to simmer until the milk in the jars has reached 180-185 degrees F. (If you don’t have a thermometer, just look for a “skin” to develop on the top of the milk.) If the milk goes beyond 180 degrees, don’t worry- it’s not the end of the world.
Carefully remove the jars from the pot (HOT!) and allow them to cool down to 110-120 degrees F. Now there are several ways to accomplish this. Some folks advise sticking them a sink filled with cool water, but I’ve found that leads to a lot of broken jars… So instead, I take the lazy way and just allow them to sit on the counter until they have cooled. I loosely cover the jars with a lid and let them sit for 30-60 minutes (I want the heat to be able to escape, but I don’t want dust/dirt/bugs getting inside.)
how to make homemade yogurt
I like to spread the jars out so they cool down faster.
Check them periodically with your thermometer and give the milk a stir to mix up any hot spots.
If you don’t have a thermometer– just feel the outside of the jars. You want them to be warm, but not too hot to touch. You are going to innoculate the milk with a live bacteria, and the bacteria likes warmth. However, too much heat will kill it– so anything that is too hot for your hand is probably too hot for the yogurt bacteria as well.
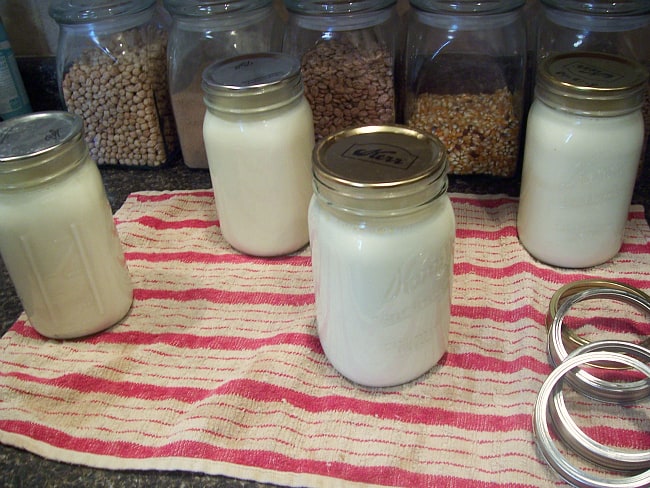
Once the milk has cooled sufficiently, gently stir 2 Tablespoons of yogurt into each jar and cap the jars (I never really measure– I just eyeball it…). Now, the incubation process begins.
There are a lot of different ways to keep your yogurt warm. Some folks like to stick it in their oven and leave the light on, but that is a recipe for disaster at my house. (I can be scatterbrained sometimes…) Therefore, I prefer the cooler method.
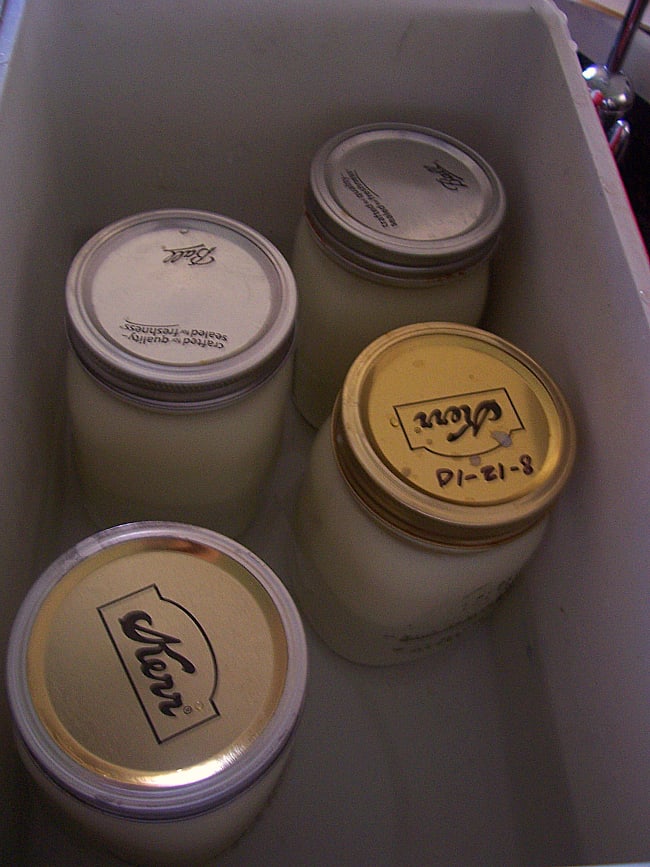
Ready to go in the cooler
You’ll need to keep the yogurt at 110-120 degrees while it incubates, and the easiest way I’ve found to do this is to place the jars in a small cooler, and then fill the cooler with warm water. You might need to replenish/reheat the water once or twice throughout the process, but for the most part, it works pretty darn good. Just make sure to keep the cooler in an out-of-the-way place and don’t bump or move it.
Allow the yogurt to incubate for a minimum of 8-12 hours (I generally start my yogurt around 9 am, and then remove it from the cooler right before I head to bed). You can leave it longer if you like, but the longer it sits, the tangier it will get. Once the incubation process is complete, remove the jars and place them in the fridge. Allow the yogurt to cool completely before eating (it will thicken a bit as it cools).
Eat plain or flavor it to your liking. Our favorite toppings are fresh fruit, maple syrup, raw honey, homemade jam, or nuts.
Homemade yogurt is also splendid in smoothies, or use my soft-cheese technique to make yogurt cheese and whey (and we all know there are lots of things to do with whey!).
how to make yogurt

Kitchen Notes:

  • Use the highest-quality milk you can for this recipe– however– it does not have to be raw, since you are “cooking” the milk at the beginning anyway. Raw yogurt is a tricky topic, as it tends to be pretty runny. My family prefers thicker yogurt, and since the bacteria that is added to the milk gives it a probiotic-punch, I don’t feel bad “cooking” it in this one application.
  • Goat milk can be used for this recipe– but be forewarned– goat yogurt is peculiarly runny as well. You can add a variety of thickeners to goat yogurt, or try straining through cheesecloth to remove some of the whey. Or, just drink it if you don’t mind it being a tad on the liquid-side.
  • Some yogurt methods say to sterilize all equipment before starting the process, but I usually don’t… Maybe I’m really living on the edge, but I figure the boiling process is good-enough for my already-clean jars. If you are nervous, then feel free to sterilize first.
  • You can purchase specific cultures for making yogurt, and those work fine as well. I prefer using high-quality yogurt from the store as my starter culture, since it’s easier to obtain. Just make sure the carton specifies LIVE ACTIVE CULTURES. Some of the more processed brands do not contain live bacteria and they won’t work for this recipe. A big carton will make many batches of homemade yogurt, and you can freeze the rest in ice cube trays to keep for later.

How to Make Yogurt in a Mason Jar
Ingredients
  • Large stockpot
  • Four quart-sized glass canning jars with lids (or repurposed glass jars)
  • A thermometer (optional- see note below)
  • A small cooler
  • 1 gallon milk
  • 8 Tablespoons of plain yogurt containing live, active cultures
Instructions
  1. Fill jars with milk, leaving 2 inches room at top
  2. Optional: To prevent jars rattling, place small dishrag in bottom of pot before you set the jars inside
  3. Set jars in stockpot and fill pot with water 3/4 of the way up the sides of jars
  4. Bring water to a boil and simmer until milk in jars have reached 180-185 degrees F or until a "skin" forms on top of milk
  5. Carefully remove HOT jars from pot and allow to cool to 110-120 degrees F (I loosely cover jars with lid and leave 30-60 minute)
  6. Check periodically with thermometer (or feel outside of jars) and stir (warm is good but too would kill your active cultures)
  7. Once cooled, gently stir about 2 Tablespoons yogurt into each jar and cap jars
  8. To keep yogurt at 110-120 degrees while it incubates place jars in a small cooler
  9. Then fill cooler with warm water
  10. You might need to replenish/reheat water once or twice throughout the process
  11. Allow the yogurt to incubate a minimum of 8-12 hours (the longer it sits, the tangier it gets)
  12. When done, remove from cooler and put jars in fridge where it will continue to thicken
  13. Cool completely before eating
  14. Eat plain or flavor to your liking- our favorite toppings are fresh fruit, maple syrup, raw honey, homemade jam, or nuts!

Friday, December 27, 2013

How to Make Yogurt


Yogurt is a creamy, probiotic-rich, nourishing, cultured dairy food. It teems with living bacteria that help keep your body’s systems in balance, especially your colon, which is essential for your body to be able to absorb the full range of nutrients you take in.1  The bacteria are also helpful in healing the colon from various gastrointestinal disorders, such as Irritable Bowl Syndrome, acute rotavirus gastroenteritis, and other diarrheal diseases. 2 The culturing of milk into yogurt utilizes lactic acid fermentation, in which the bacteria break down lactose, a sugar that naturally occurs in the milk. Because of this, the nutritional definitions of yogurt differ from the original milk, including being higher in folic acid, a necessary B-complex vitamin for women of childbearing age, and more importantly, actually increasing the bio-availability of folate3. This also makes yogurt more easily digestible than other milk products for people with lactose sensitivities.
Making yogurt at home can also save you 50-75% off the cost of buying it, making it certainly worth the effort!

What You’ll Need

Begin by gathering all your supplies. It’s incredibly helpful to have everything prepped and ready to go before you start.
Equipment:
  • Stockpot large enough to easily accommodate two litres of milk
  • Whisk or wooden spoon
  • Thermometer (optional, but extremely helpful)
  • Containers for culturing and storing the yogurt (I typically use mason jars, but you can use any crock, glass jar, ceramic or glass bowl, or any other non-reactive container. Some people reuse old yogurt containers, but I personally shy away from any plastics that are difficult to get super-super clean. After all, you are going to be incubating bacteria at the perfect temperature for growth…)
  • Bowl for whisking yogurt starter
  • Your tools for incubation, according to incubation method: heating pad and towels, cooler or large stockpot, food dehydrator, etc.
Ingredients:
  • 2 litres (approx. 8 cups) milk
  • 1/2 – 1 cup yogurt starter culture – this can be a cup of yogurt from your last batch, a cup of plain store-bought yogurt with no gelatin or other additives, or a packaged yogurt starter

Making Yogurt

There are four parts in the yogurt-making process: warming the milk, cooling the milk, inoculating it (culturing it), and incubating it.
Sterilize
  1. Make sure all equipment is very clean. If possible, sterilize your jars or containers in a pot of boiling water.
Warm the Milk
  1. Place the milk in a saucepan or stockpot large enough to comfortably accommodate the milk with a bit of room for whisking. Preferably choose a heavy-bottomed pot with a lip, as this will reduce the amount of milk that scalds and will help make pouring the milk later drip-free.
  2. Heat to 180-190, whisking occasionally, especially once the milk passes 160. (This is when it begins to foam and scald – latte anyone?) If you don’t have a heavy-bottomed pan and your milk does begin to scorch and stick to the sides of the pan, don’t stress about it. Just take a bit of extra care when you’re whisking so that you don’t scrape off any of the scalded bits into the milk – you can just clean them out later. Also, a note about why you’re heating the milk – regardless of whether you’re using raw milk or conventional milk, gently heating the milk in this manner physically changes the molecular structure of the milk proteins which will result in a decidedly firmer yogurt.
Cool the Milk & Inoculate
  1. Once the milk has reached 180° or so, cool it to approximately 115°. [If you don't have a thermometer, I've heard it said that the milk is cool enough when you can hold your (very clean) little finger in the milk for 10 seconds.] You can cool your milk in a number of ways; just choose which works best for you.
    • an ice bath cools the milk quickly and safely
    • place it in the refrigerator (if you’re doing a large batch, such as a gallon or more, this method is not preferable as it will heat the refrigerator too much as it cools)
    • in the winter, you can cover it and place it outside away from pets, other animals, or anything that could knock it over or fall in it
    • just cover with a cloth and let it sit at room temperature until it’s cool – this will typically take a few hours
  2. Have your starter culture ready in a bowl. When the milk has reached approximately 112 degrees, whisk some of the warm milk into the starter culture, then whisk the warmed culture into the entire pot of milk. After the mixture is mixed, pour the prepared milk into your containers.
Incubate
  1. At this point you have your choice of how to incubate it. The yogurt culture needs to sit at 108-112 degrees for 6-8 hours, so however you can come up with to keep it at that temperature should work just fine. (My sister even successfully set her jars outside for a number of hours covered with a towel when she lived in sub-tropical climes. That definitely wouldn’t work in my more northerly location!)
    Here are some of the most popular methods:
Food Dehydrator: If you have a food dehydrator with removable trays, such as Excalibur, LEM, or Weston, remove all the trays, set your containers inside, replace the door, and set the temperature control for 112. Come back in six hours and your yogurt should have set perfectly! Note: don’t open the door unless absolutely necessary during the incubation time, as it may change the temperature inside the dehydrator overmuch.
Oven overnight: Preheat your oven to it’s lowest temperature – basically turn your oven control dial just until the indicator light comes on. If you’ve got touch buttons, set it as low as it will go. You just want the temperature to be around 112 without being much warmer than that. When the oven is preheated, turn the oven off, turn the oven light on, set your prepared containers in the oven, and leave them there for 6-8 hours – overnight is great. Remove them when the yogurt is thick.
Water bath: Set your prepared containers in a large pan with warm water as far up the jars as possible and cover with towels all around. Check the jars every couple of hours to make sure the water temperature hasn’t dropped. If the water is too cool, change the water to return it to the proper temperature. I used this method for quite awhile, but I found it to be a hassle, and it also disturbs the yogurt when you change the water, which can make the process not as effective. Remove the jars when the yogurt is thick after about eight hours.
Heating Pad: Set your prepared containers on top of a heating pad, invert a large stockpot over them, and cover the pot with towels. Turn the heating pad to “high” or “medium,” depending on your particular heating pad. Mine doesn’t get very warm, so “high” is definitely necessary. Also, be careful to note if your heating pad has an automatic shut-off feature. Mine turns off every half-hour, so when I use this method I have to make sure I turn the heating pad on again every 30 minutes. Remove the jars after 7-8 hours.
Note: If you’re using just one large container for your yogurt instead of several smaller containers, you can use the heating pad another way as well. Place your stockpot right side up, set a towel in the bottom, put your yogurt container inside it, wrap the heating pad around the jar between the jar and the wall of the stockpot, then cover the whole she-bang with a load of towels. Incubate as above.
Yogurt Maker:This typically only works for a litre or so at a time, as yogurt makers tend to incubate in one-serving size cups (which is great if you’ve got kids and your mornings are rushed – just pass them a little cup with some fruit and whole grains and they’ve got breakfast!). Spoon your prepared milk into the yogurt maker’s cups, set the lid in place, and turn on the machine. From that point, follow the manufacturer’s instructions.
  • At the end of 6-8 hours, the yogurt should be somewhat firm and pull away from the side of the container with only a bit of whey (extra liquid). The yogurt will continue to firm up in the refrigerator, so for the best flavor and texture, refrigerate at least six hours before serving.
    Yogurt Troubleshooting: If you’ve got too much whey, you likely incubated longer than necessary. If the yogurt is too thin, the temperature was too high or too low, the milk wasn’t fresh, or your starter wasn’t sufficient, either because you didn’t use enough or because the culture was old. Yogurt culture can degrade over time due to the introduction of foreign bacteria so using a fresh starter every few batches is recommended.

So, now you’ve got a fridge full of inexpensive, delicious, nourishing yogurt! And even better, if you are able to do this regularly, it will become second nature and an easy part of your kitchen routine.


If you’d like to get adventurous with your yogurt-making, check out these great resources for some variation.
Four Secrets to Thick, Creamy Yogurt Every Time
5 Ways to Make Thicker Yogurt
Making Yogurt with Raw Milk
Raw Milk Yogurt: To Heat or Not to Heat? That is the Question
Direct-set Cultures (video)
Making Greek-style Yogurt (video)
How to Make Non-Dairy Yogurts (video)
Alternative Milks for Making Yogurt
How to Make Yogurt in a Crock Pot
How to Make Yogurt without Fresh Milk

The Advantages of Room Temperature (Mesophilic) Yogurt
How to Make Room Temperature (Mesophilic) Yogurt
(video)
10 Ways to Use Whey