


How to Make Yogurt in a Mason Jar
By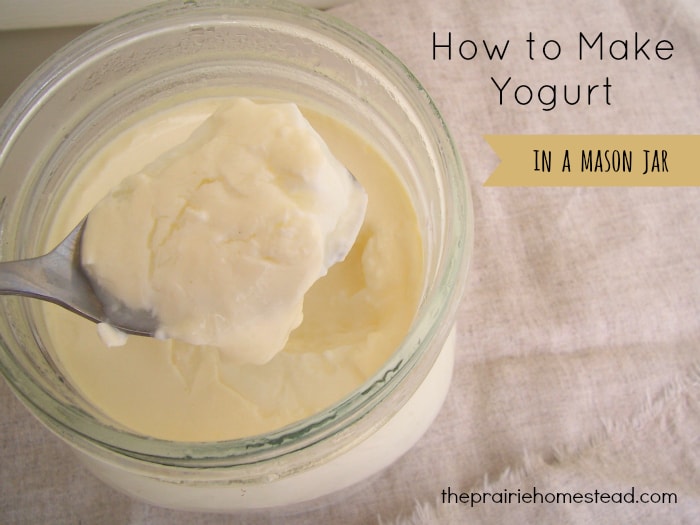
There are lots of reasons to make your own yogurt. But the most important?
It’ll make you feel like a homesteading rockstar.
Oh yeah.
Okay… so maybe that isn’t the *most* important reason, but it sure is fun.
And besides the rockstar-thing, homemade yogurt is super nutritious (hello probiotic-goodness without all the flavorings and additives…) and pretty darn frugal, too.
There are a million-and-one ways to make yogurt, and everyone seems to have their favorite method–Crockpot, yogurt maker, etc
I’ve tried a bunch of different methods, but I’ve settled on the one I’m sharing today. It’s the simplest yogurt method I’ve found (in my opinion), and I like that I don’t have to wash out my big ol’ stockpot or Crockpot when I’m done.
I like to make a gallon of yogurt (4 quarts) at a time since it stores for a long, long time without going bad. If you don’t want to make quite that much, the recipe can easily be halved or quartered.
How to Make Yogurt in Mason Jars
Supplies:- Large stockpot
- Four quart-sized glass canning jars with lids
- A thermometer (optional- see note below)
- A small cooler
- 1 gallon milk* (see note below)
- 8 Tablespoons of plain yogurt containing live, active cultures
Fill all four jars with milk, leaving a little room at the top– (around 2 inches). If you don’t have canning jars, you can use other repurposed glass jars instead. (It has to be glass- no plastic allowed!)
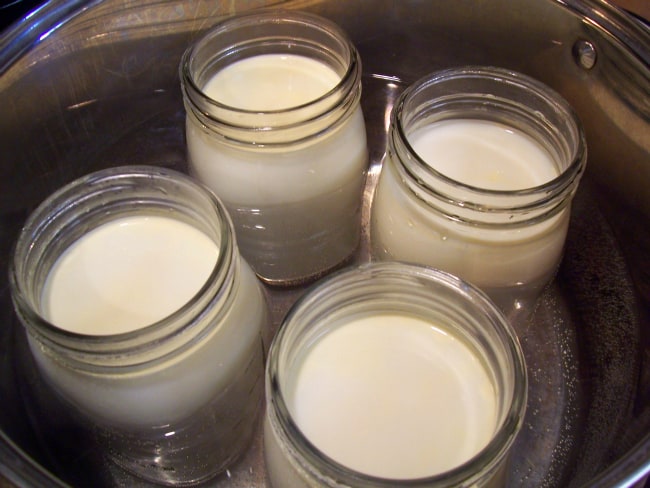
Place all four jars in the stockpot, and fill the pot with water. I usually shut it off when the water is about 3/4 of the way up the sides of the jars. If you are concerned about the jars rattling and breaking, you can place a small dishrag in the bottom of the pot before you set the jars inside.
Set the pot on the stove and bring the water to a boil. Allow the pots to simmer until the milk in the jars has reached 180-185 degrees F. (If you don’t have a thermometer, just look for a “skin” to develop on the top of the milk.) If the milk goes beyond 180 degrees, don’t worry- it’s not the end of the world.
Carefully remove the jars from the pot (HOT!) and allow them to cool down to 110-120 degrees F. Now there are several ways to accomplish this. Some folks advise sticking them a sink filled with cool water, but I’ve found that leads to a lot of broken jars… So instead, I take the lazy way and just allow them to sit on the counter until they have cooled. I loosely cover the jars with a lid and let them sit for 30-60 minutes (I want the heat to be able to escape, but I don’t want dust/dirt/bugs getting inside.)
I like to spread the jars out so they cool down faster.
If you don’t have a thermometer– just feel the outside of the jars. You want them to be warm, but not too hot to touch. You are going to innoculate the milk with a live bacteria, and the bacteria likes warmth. However, too much heat will kill it– so anything that is too hot for your hand is probably too hot for the yogurt bacteria as well.
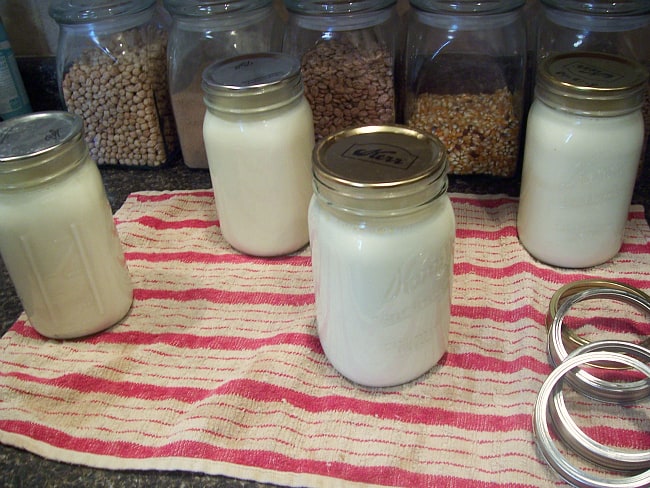
Once the milk has cooled sufficiently, gently stir 2 Tablespoons of yogurt into each jar and cap the jars (I never really measure– I just eyeball it…). Now, the incubation process begins.
There are a lot of different ways to keep your yogurt warm. Some folks like to stick it in their oven and leave the light on, but that is a recipe for disaster at my house. (I can be scatterbrained sometimes…) Therefore, I prefer the cooler method.
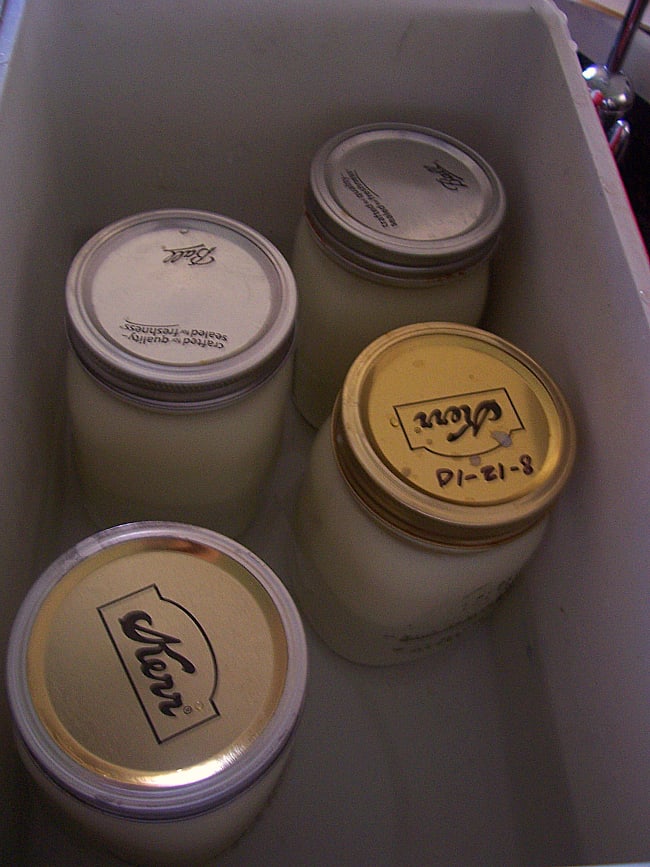
Ready to go in the cooler
Allow the yogurt to incubate for a minimum of 8-12 hours (I generally start my yogurt around 9 am, and then remove it from the cooler right before I head to bed). You can leave it longer if you like, but the longer it sits, the tangier it will get. Once the incubation process is complete, remove the jars and place them in the fridge. Allow the yogurt to cool completely before eating (it will thicken a bit as it cools).
Eat plain or flavor it to your liking. Our favorite toppings are fresh fruit, maple syrup, raw honey, homemade jam, or nuts.
Homemade yogurt is also splendid in smoothies, or use my soft-cheese technique to make yogurt cheese and whey (and we all know there are lots of things to do with whey!).
Kitchen Notes:
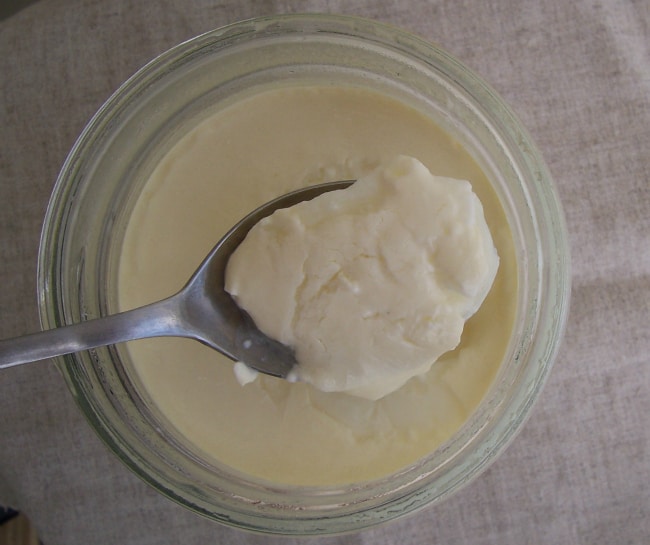
- Use the highest-quality milk you can for this recipe– however– it does not have to be raw, since you are “cooking” the milk at the beginning anyway. Raw yogurt is a tricky topic, as it tends to be pretty runny. My family prefers thicker yogurt, and since the bacteria that is added to the milk gives it a probiotic-punch, I don’t feel bad “cooking” it in this one application.
- Goat milk can be used for this recipe– but be forewarned– goat yogurt is peculiarly runny as well. You can add a variety of thickeners to goat yogurt, or try straining through cheesecloth to remove some of the whey. Or, just drink it if you don’t mind it being a tad on the liquid-side.
- Some yogurt methods say to sterilize all equipment before starting the process, but I usually don’t… Maybe I’m really living on the edge, but I figure the boiling process is good-enough for my already-clean jars. If you are nervous, then feel free to sterilize first.
- You can purchase specific cultures for making yogurt, and those work fine as well. I prefer using high-quality yogurt from the store as my starter culture, since it’s easier to obtain. Just make sure the carton specifies LIVE ACTIVE CULTURES. Some of the more processed brands do not contain live bacteria and they won’t work for this recipe. A big carton will make many batches of homemade yogurt, and you can freeze the rest in ice cube trays to keep for later.
Ingredients
- Large stockpot
- Four quart-sized glass canning jars with lids (or repurposed glass jars)
- A thermometer (optional- see note below)
- A small cooler
- 1 gallon milk
- 8 Tablespoons of plain yogurt containing live, active cultures
Instructions
- Fill jars with milk, leaving 2 inches room at top
- Optional: To prevent jars rattling, place small dishrag in bottom of pot before you set the jars inside
- Set jars in stockpot and fill pot with water 3/4 of the way up the sides of jars
- Bring water to a boil and simmer until milk in jars have reached 180-185 degrees F or until a "skin" forms on top of milk
- Carefully remove HOT jars from pot and allow to cool to 110-120 degrees F (I loosely cover jars with lid and leave 30-60 minute)
- Check periodically with thermometer (or feel outside of jars) and stir (warm is good but too would kill your active cultures)
- Once cooled, gently stir about 2 Tablespoons yogurt into each jar and cap jars
- To keep yogurt at 110-120 degrees while it incubates place jars in a small cooler
- Then fill cooler with warm water
- You might need to replenish/reheat water once or twice throughout the process
- Allow the yogurt to incubate a minimum of 8-12 hours (the longer it sits, the tangier it gets)
- When done, remove from cooler and put jars in fridge where it will continue to thicken
- Cool completely before eating
- Eat plain or flavor to your liking- our favorite toppings are fresh fruit, maple syrup, raw honey, homemade jam, or nuts!


0 comments:
Post a Comment