April 3, 2013
Happy Homesteading: Making Homemade Soap
This episode of
Happy Homesteading is all about making homemade soap!
This one took a whole lot of research to figure out. I read and
learned how they used to make it during the 1800′s. And then I talked
to a local soap making artisan and asked her for some advice on best
places to order products. This was by far one of the most interesting
projects I have done thus far, and it was a lot easier than I thought it
would be, although somewhat dangerous.
History
Soap made from
scratch consists of 2 main ingredients. Animal fat (tallow or lard) and
lye. They would make tallow by slow cooking beef fat for 3-4 hours on
low, remove any cooked meat bits and strain it. Then let it cool and you
have homemade tallow. I do plan on making some of this soon.
Homemade lye is
made from wood ashes. There is a process of basically using straw,
pouring the ashes over the top in a barrel, then pouring water over
them. After a few days the liquid is lye. I would love to try to make
homemade lye myself too. I am just a little bit nervous though since I
have kids around and this stuff can burn skin. But they usually had
kids around too back in the olden days. If they can do it so can I.
Images are from childrens book:
Pioneer Children of Appalchia
Making Homemade Soap for the first time

After talking to a local soap artisan about how to get started making soap, she recommended this kindle book called
Basic Soap Making
– you can download it on Amazon. At that time this ebook was FREE but
now it’s up to $10.99. I downloaded it to my Android phone and read
the whole thing in less than an hour. It’s a great book with LOTS of
pictures to help you when you are getting started. I am a visual person
so I love all the pictures. There are some recipes and ideas to make
all kinds of interesting bars as well.
Definately worth reading if you want to make soap.
I followed the directions to make the Basic 4 Oil Soap recipe in this
book and I think it turned out really well. Just remember to follow the
directions and safety protocols when using lye. It is a chemical and I
read through a few horror stories while doing my research of kids
grabbing the lye water mixture and burning themselves badly. Not worth
that little bar of homemade soap for a blind kid..just keep that in
mind. I decided to do my recipe when all the kids were gone to school
for the day.
INGREDIENTS:
Supplies:
- rubber gloves
- digital scale
- mold of some sort
- plastic mixing bowls
- thermometer
- immersion blender
- freezer paper
Ingredients for 4-oil soap recipe from Basic Soap Making book
- 4 ounces coconut oil (solid)
- 3 ounces canola oil
- 4 ounces olive oil
- 4 ounces safflower oil
- 2 ounces lye – (you can buy this at Ace Hardware store)
- 5 ounces distilled water
You need quite a lot of supplies to safely make homemade soap. I
found a nice little strange egg container at a thrift store with a lid
that I knew would be perfect shape for making soap, and it only
costed me $3.00.
DIRECTIONS
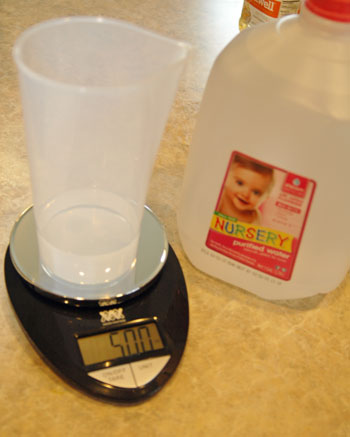
First thing I did was to tare the digital scale and measure out distilled water in a plastic dish.
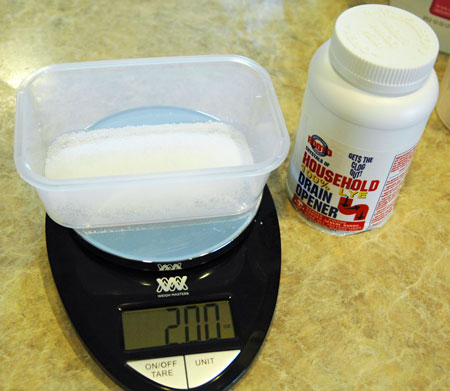
Next I measured the dry lye crystals in a plastic dish.

I then added the WATER first to an old plastic ice cream bucket. Then
I slowly added in the lye crystals. Note: NEVER pour water into the
lye, always add lye crystals to water. Oh and make sure you don’t
splash.
The lye and water got REALLY HOT, it was a chemical reaction. I
noticed some steam and horrible smelling vapors, so I opened the window.
I started stirring the lye & water mixture gently until the lye
crystals were dissolved. Then I set it aside to cool (we want it to cool
to around 100 degrees).
Next was measuring out the oils.

I placed a plastic bowl on the scale, tared it to say zero and
started adding in the coconut oil. If I added to much I would take some
away until it said 4 oz. Then I melted it in the microwave.
I did this with all the other oils as well. Measuring them out with the scale. You have to be really exact with soap making.
Next I gently mixed all the oils together into a bowl. Then once the
lye solution cooled to 100 degrees I added in the lye/water mixture,
being careful not to splash. I used my spatula to gently stir the
mixtures together for a minute until it became slightly opaque.
Then I took out my immersion blender and started blending being
careful not to splash, and keeping the blades near the bottom of the
mixture. I did this for around 2 minutes maybe…not really sure. And I
didn’t have any of my photographers (aka kids) to take my pictures this
time because I wanted to make this when they weren’t home. So no
pictures of me using the immersion blender for now. When it started
getting nice and thick I turned off the immersion blender and mixed by
hand until it reached trace.
Since this was my first time trying to reach TRACE I wan’t exactly
sure what it was. Its when the soap mixture is ready to pour into molds.
You can tell its reached trace when the soap mixture falls from your
spatula leaving a trail of soap on the surface of the mixture for a few
seconds before it disappears into the mixture.
I then poured the mixture into my plastic mold. I didn’t add a
freezer paper liner since my container is made of plastic and I heard
that it would just pop right out when dry. I put the lid on, covered it
up with two towels, let it rest to complete its saponification process
for 24 hours.
PS – you have to wait for 24 hours to clean all your tools too, so
just leave your tools out to dry. After 24 hours my soap looked great!
The only problem was that I should have used a freezer paper liner,
because it did not want to just pop out of my plastic container.

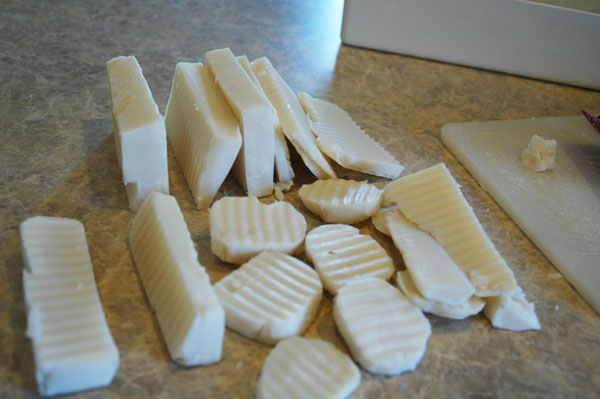
I had the worst time trying to get it out of the container and
instead had to take it out in strange shards. I was really sad about it,
hoping for beautiful square bars. Some I just rolled into a ball and
cut into rounds. I then cut what I could using my pampered chef waffle
cutter. Here are all the strange pieces I was able to get out of it.
And lastly, you have to dry your soap for awhile. It’s best to cure
it for about a month or even 6 weeks. The longer you air dry it the
longer it will last when you use it.
It’s been a month now and my bars of soap have dried.
This recipe works really well, it lathers great and has no fragrance.
It’s a really nice clean soap. I rather enjoyed making soap for the
first time, and will be making more for the fun of it.
WORTH THE COST FOR THIS RECIPE? NO - if
you are an Ivory soap user. Ivory soap cost’s less to buy at Walmart
than making it yourself. But if you like the more artisan or fancy
brands of soap than this recipe is more cost effective. Later on I
will be making a tallow/homemade lye recipe and will be doing a cost
comparison on that one which I think will be more cost effective – stay
tuned.
WORTH THE TIME? NO,
but it was fun to make! Making homemade soap takes time, there is risk
involved when working with lye, and then you have to let it cure for a
month or longer. So buying the store bought Ivory soap is a quick
affordable easier option. But I still had a blast making it…and will be making more for fun.
Price Breakdown (note: I ended up making a double batch because my container was big):
Lye ( found at Ace Hardware) $3.99/16 oz. = $0.99/4 oz used
4 ounces coconut oil (solid) ($4.99/14 oz) = $2.85 for 8 oz.
3 ounces canola oil ($2.24/48 oz.) = $0.28 for 6 oz.
4 ounces olive oil ($2.99/16 oz.) = $1.50 for 8 oz.
4 ounces safflower oil ($3.98/32 oz) = $1.00 for 8oz.
5 ounces distilled water ($1.00/gal) = $0.07 for 10 oz.
Final cost: $6.69/ 2.2 lbs. 2.2 lbs of soap = 35.2 oz.
Lets compare this homemade soap recipe to a 6 pack of Dove soap which
costs $6.88 for a 6 pack at Walmart. Each bar is 4 oz. To get 32 oz.
like in my homemade recipe it would cost around $9.17 worth of Dove
soap.
Ivory soap is one of the least expensive brand of bar soap, so I
wanted to compare them as well. A 3-pack of Ivory soap is $1.27 at
Walmart. To get 32 oz. like in my homemade recipe it would cost around
$6.45 for 32 oz. Ivory soap is a teeny bit less expensive than making
soap yourself at home.
Final thoughts on making my own Homemade soap.
I like that I know all the ingredients that went into making my own
soap, and it was a really fun project! But it was a little bit
stressful and dangerous. I could have burned myself with lye, so there
is risk involved. I like that I learned how to make it and am really
excited to try other recipes too. I think science is fun!
Stay tuned for me making homemade soap with homemade tallow and homemade lye in the future.

I’m guessing this will be even more cost effective, but who knows!
http://happymoneysaver.com/happy-homesteading-making-homemade-soap-2/